Only the truly damned can know the suffering of those, for whom the perfect camera bag is a white whale obsession. Too big, too small, the wrong access, no hydration – we mutter this to ourselves, as those who love us climb the widow’s walk of Gear Acquisition Syndrome, and curse the sea for its cruel humour, for not just taking us and ending the pain.
Yes, buying a camera bag can be a fraught experience. This isn’t helped by the fact that the subject of this first look must be making its bags out of unicorn skin, with chickenteeth zippers, such is their rarity in retail outlets. I’ve just taken delivery of one of the first production run of the (now sold out) new F-Stop Lotus bags, so here’s an unboxing and first look.
Quick statistics – the Lotus is the smallest of F-Stop’s Mountain series packs. It’s a 32 litre shell with one main compartment, and side, front and top-of-lid compartments. Why would you get it? In my case – it’s compact enough to be a large daybag / everyday carry (with camera), but has a harness and numerous external attachment points, to enable it to be loaded up for lightweight overnighting.
Unboxing
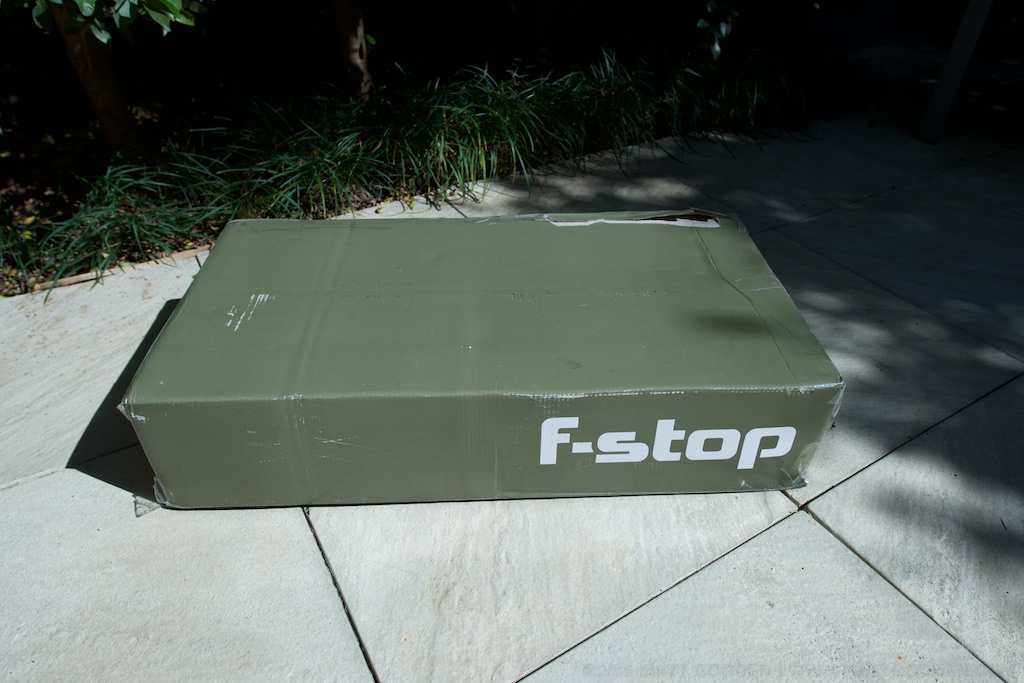
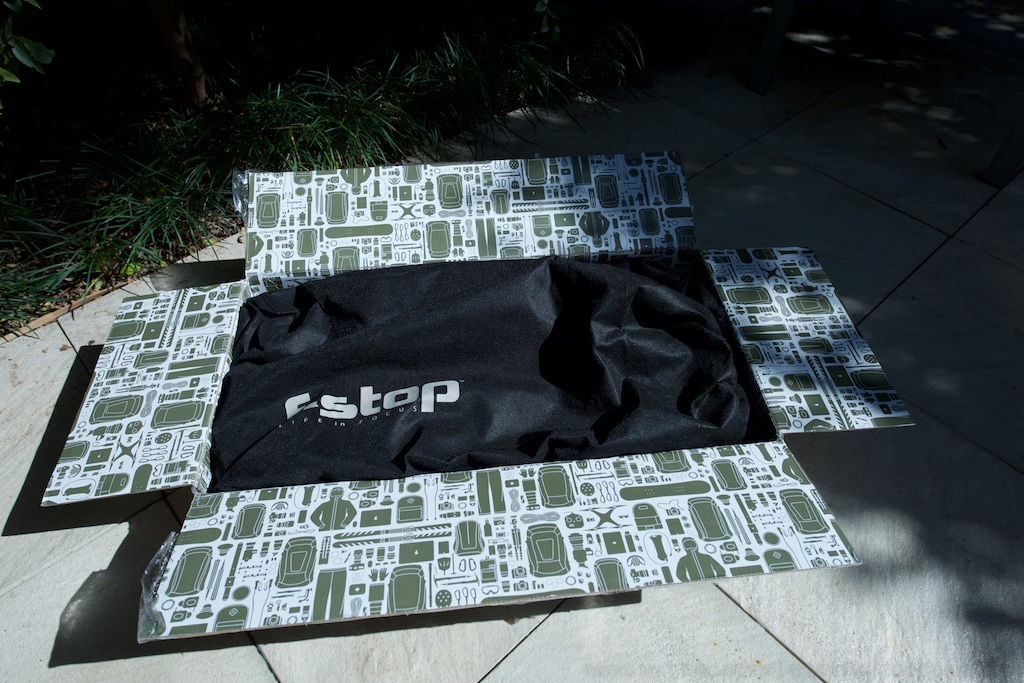
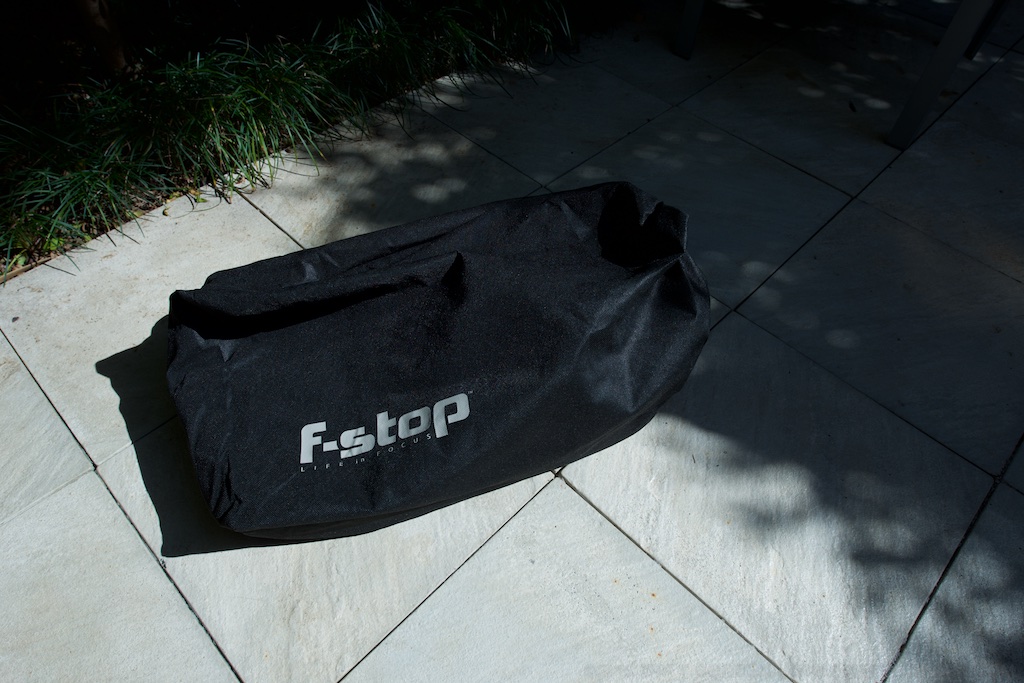
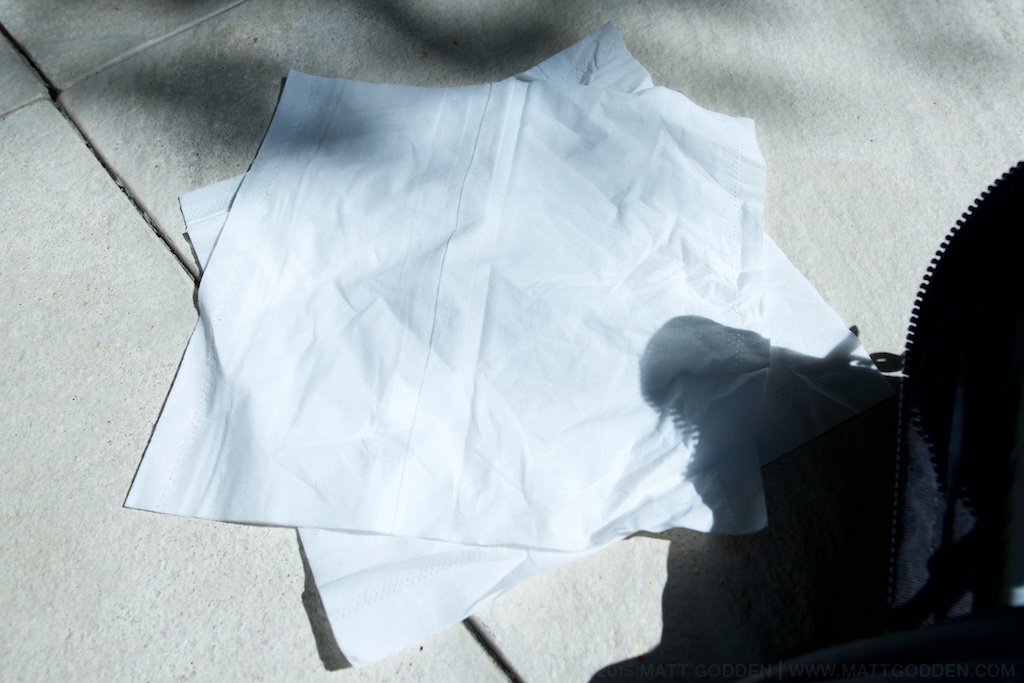
The purchasing experience was, well, it was ordered & paid for on F-Stop’s website in late June, with a scheduled July delivery, and it arrived at the end of September. Once the delivery was scheduled, it arrived a few days earlier than forecast. As you can see by the photos, the delivered box isn’t exactly Apple-pristine in terms of packaging , but it did the job of protecting the contents. The drawstring F-Stop duffel bag, which an ICU I bought earlier also had, is a really nice packaging idea, rather than a plastic bag or similar.
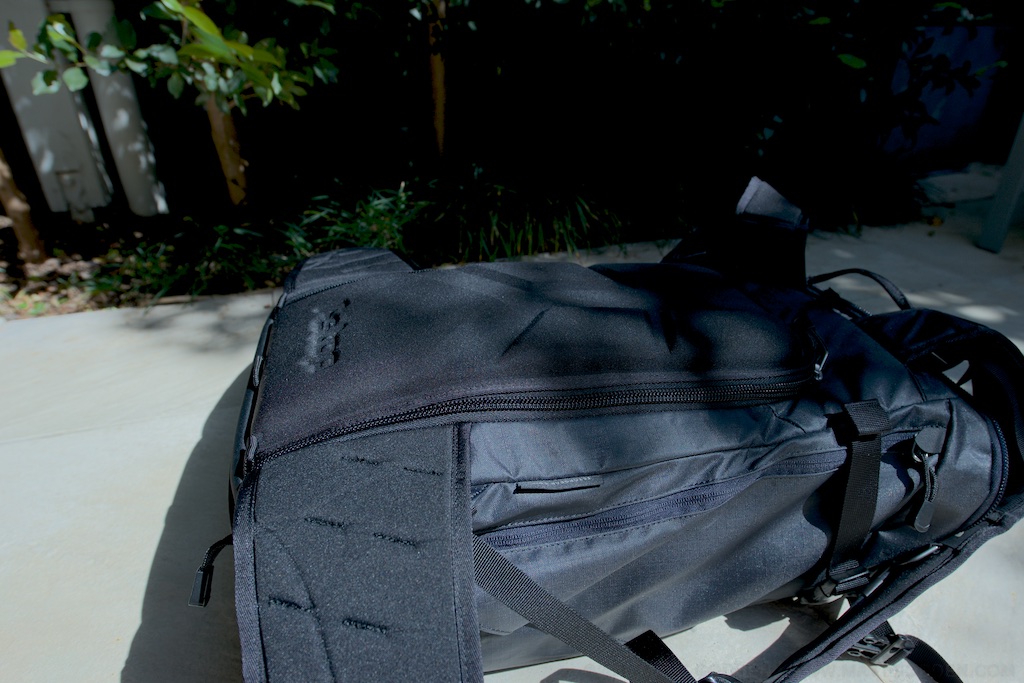
My bag is the Anthracite colour. It’s black. VERY Black. Like “sucking all the light out of the room so you can only see it by its silhouette” black. All these pics were shot in daylight, metered with incident light, and colour meters, then shadow recovery in Aperture had to be turned up to the maximum to show the details. When you look carefully, you can see a checkered pattern, and it’s got this slightly rubbery texture.
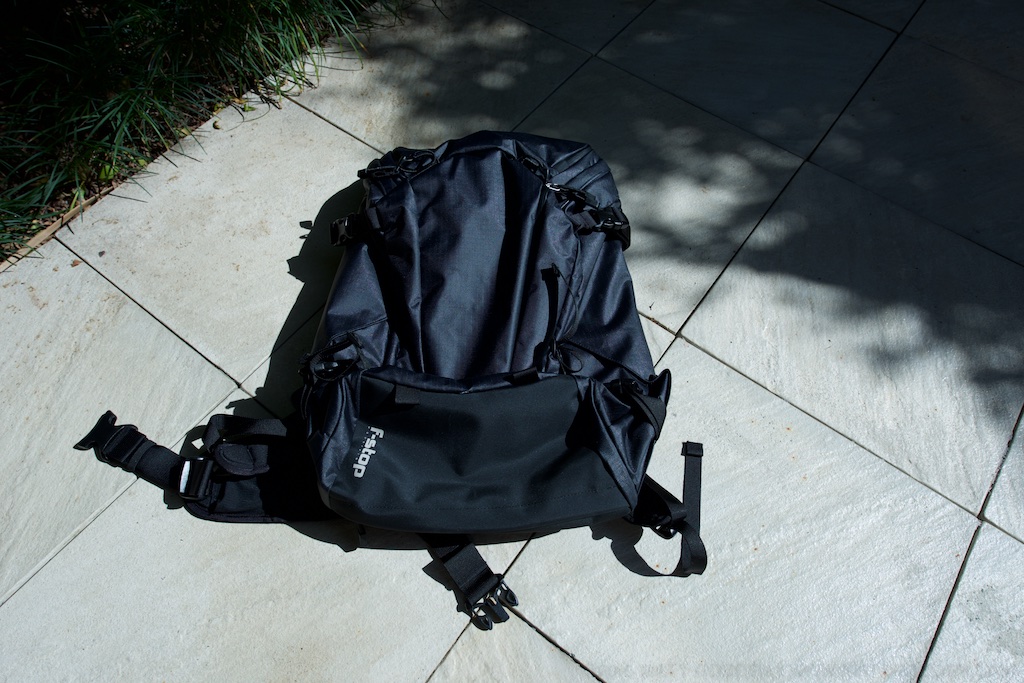

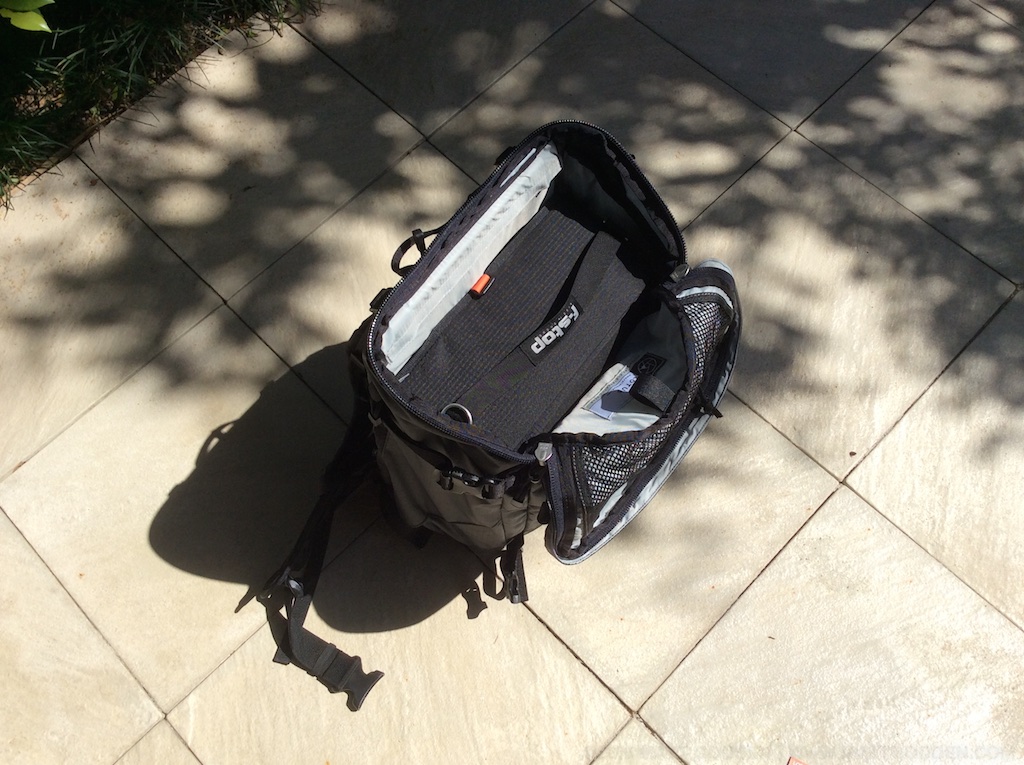
The inside of the side and front pockets are of a lighter material, and don’t have the same rubberised feel to them. Given that the front pocket has a weep-hole, and is intended to be a place to stow wet outer layers, or snow tools, a question that arises is…
Moisture Ingress?
The best test I could think of was to get a bottle of water out of the fridge, run it under the tap, to simulate condensation, and then rotate it against the inside lining of the front pocket, while holding up a tissue to the other side, to see if any water wicked through. While the cold came across, as far as I can tell, the tissue itself is bone dry.


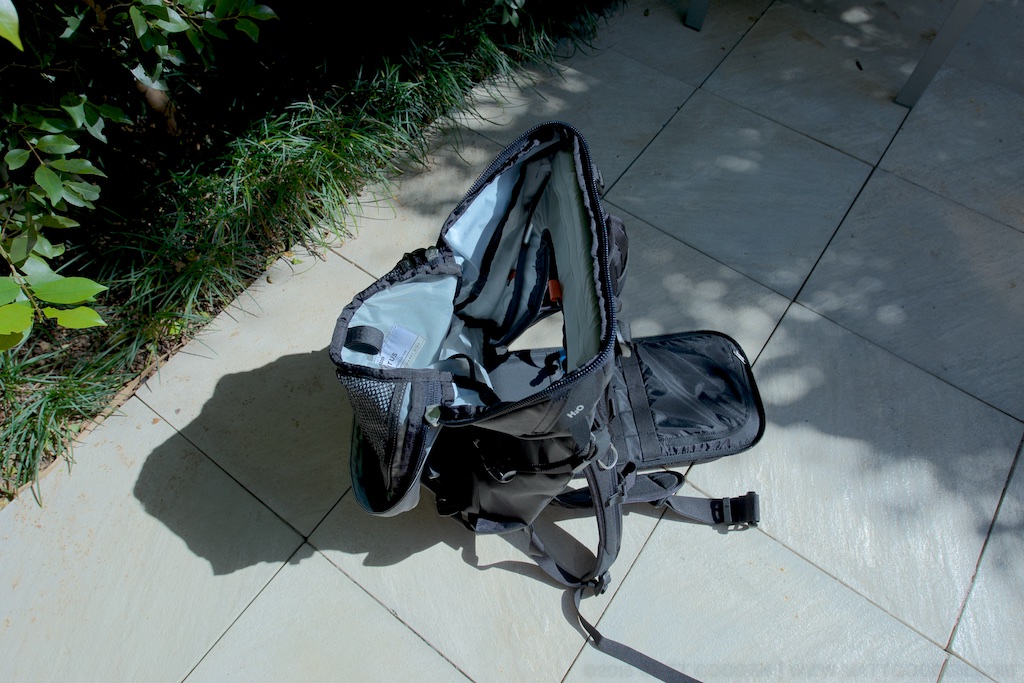
The inside of that front pocket is actually the pouch for an internal water bladder, so you might be wondering why I’m concerned – it’s mainly down to that pouch also being where an iPad or small laptop is supposed to sit, if you’re not carrying water internally. More on that later on.
ICU Fitting
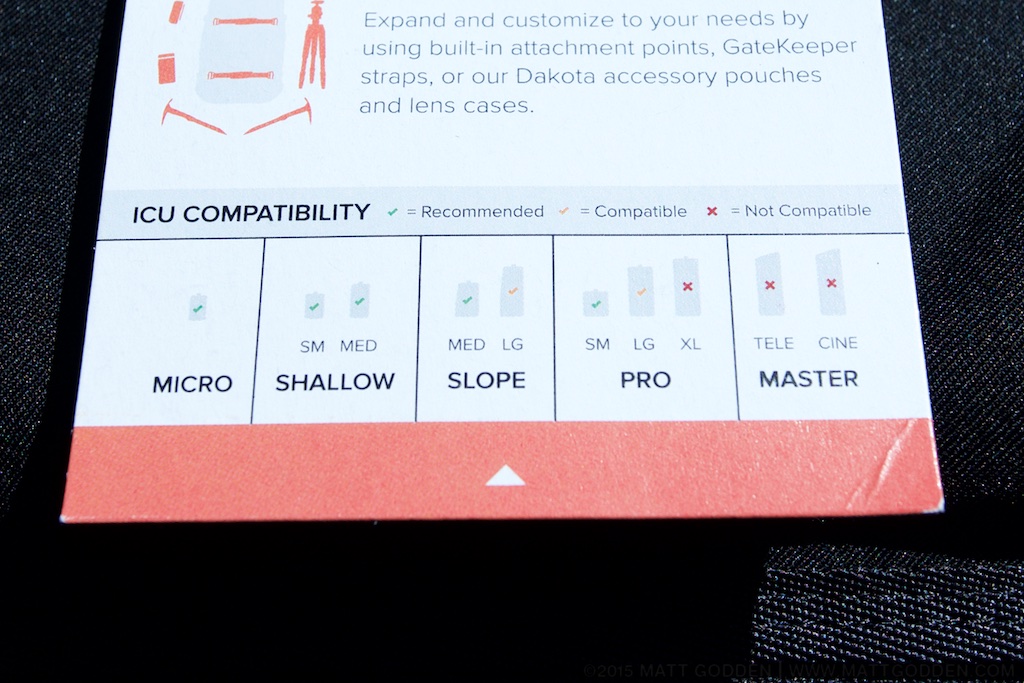
What’s an ICU? F-Stop’s bag system is based around the camera being in a padded, removable bag, the Internal Camera Unit, which straps into the shell, to be accessed via the back panel. These ICUs come in numerous sizes, and styles. One of F-Stop’s weaknesses, however, is their pre-sale documentation. When I bought this pack, for example, there was nothing on their website to tell me which ICUs were suited to the pack. As a result, I made a best guess, and bought one which is listed as “compatible” but not “recommended”. The bag itself has a tag showing what they recommend, but this startlingly useful information is not available online.
In the Large Slope ICU, I can fit my full current kit, which comprises: Nikon d800, Nikkor 14-24g, 60g Micro, Spherical pano head, Manfrotto magnesium 3-way head, light meter, colour meter, some filters, and a few other cables, battery charger etc.
The way this is supposed to work, is you fold the top of the ICU under it, slip it into the bag, then attach the velcro tabs around the eyelets on the bag’s frame to hold the ICU against the back aperture. What I found is that the ICU didn’t naturally rest far enough into the bag for the tabs and eyelets to line up. Pulling the foam from the ICU lid went part way to alleviating the problem, but it still felt like I was forcing it to fit in place.
Now, it may be that this serves a purpose, ensuring the ICU is tensioned against the bottom of the bag.
The other problem is that when attached, the ICU is actually taller than the inside of the bag, so with the back unzipped, the ICU wedges the back open. Again, maybe there’s a logic to this, but my next ICU is going to be a shallow model.

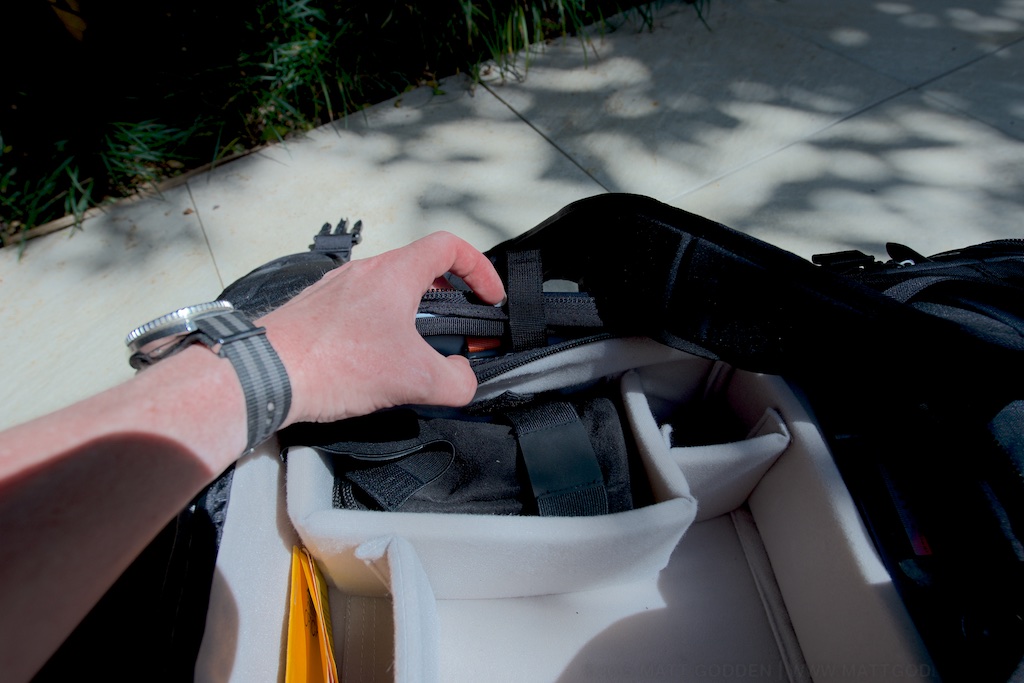

There’s also a mystery eyelet at the top, which should be perfect for securing the top of a tall ICU, but there’s no matching velcro tab on mine.
Hydration
Hydration was one of the features which really caused headaches for me while looking around for bags. My previous (non-camera) bag, by Camelbak, is more of less the gold standard for this. The bladder is kept in a sealed, insulated compartment, centred on your spine. Looking around at camera bags, hydration was either absent, or fixed on one side. I wanted the freedom to shift water-weight depending on whether I had a tripod strapped to the side of the bag or not.


The Lotus’ external pockets are large enough that you can put a 2 litre bladder in any of them. There’s an internal pocket to hang a bladder in, but it shares duty as the laptop sleeve. I also can’t quite trust the idea of keeping water inside the pack with my electronics.
If there’s a criticism I can level here, and an improvement for the next version of the pack, it’s that hanging loops in the side and front pockets would provide a huge utility and flexibility boost, with no appreciable downside.
Compatibility
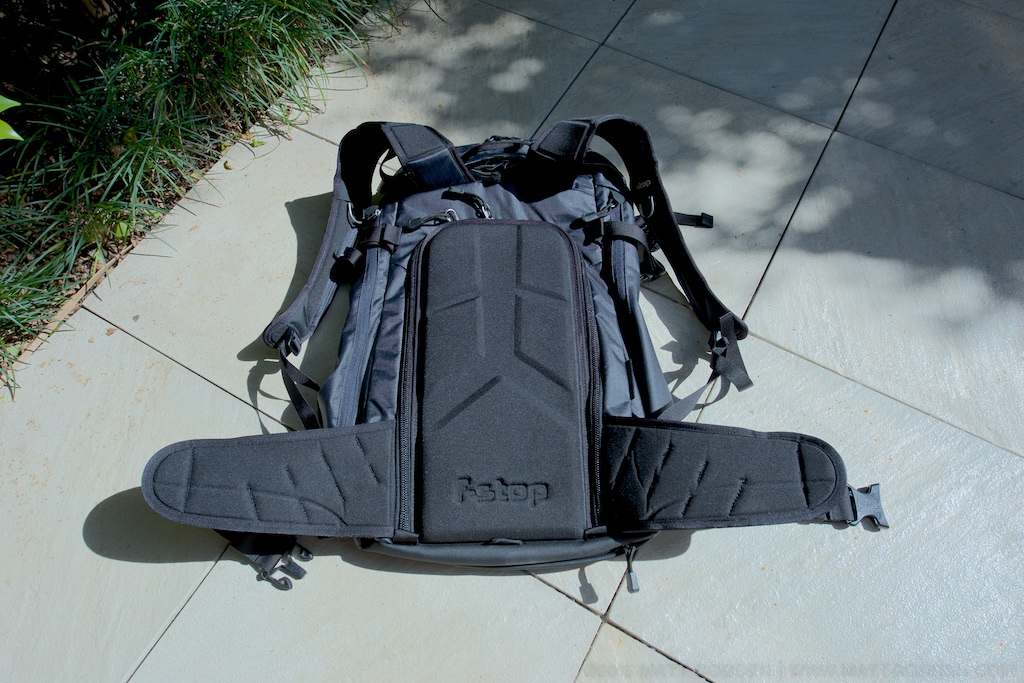
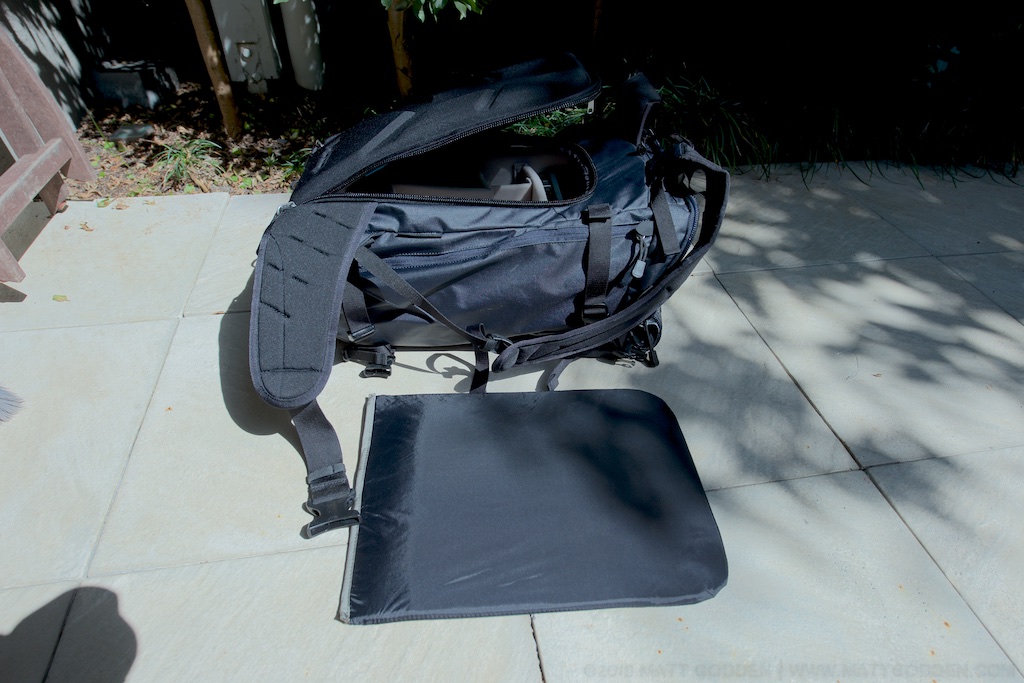
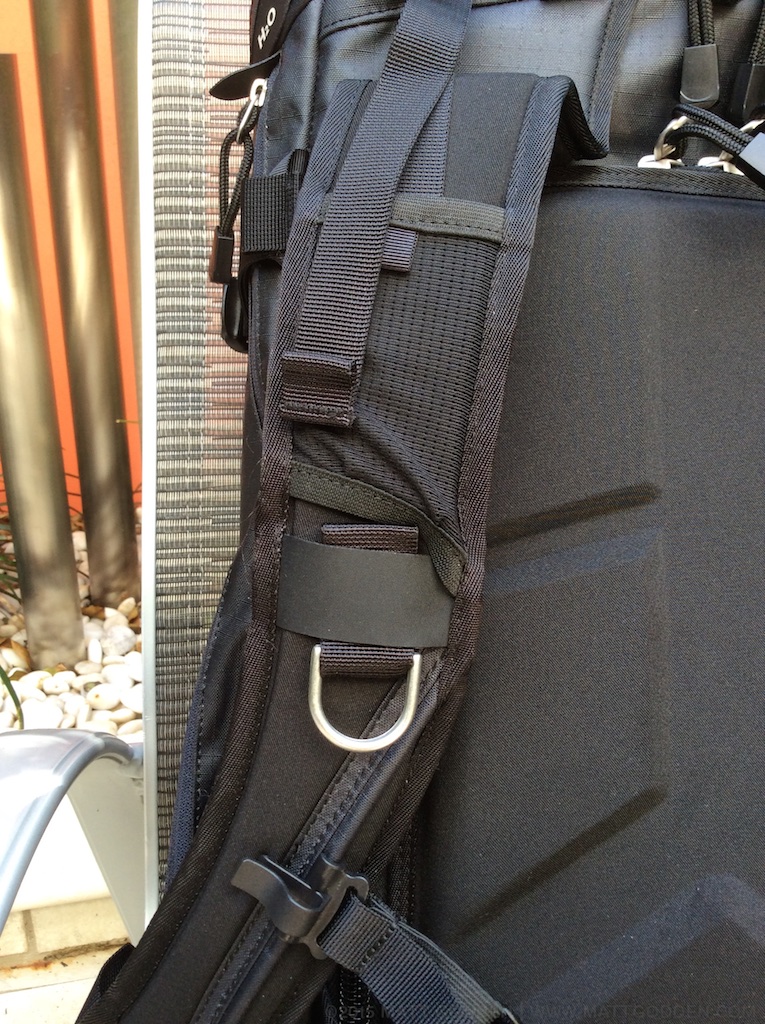
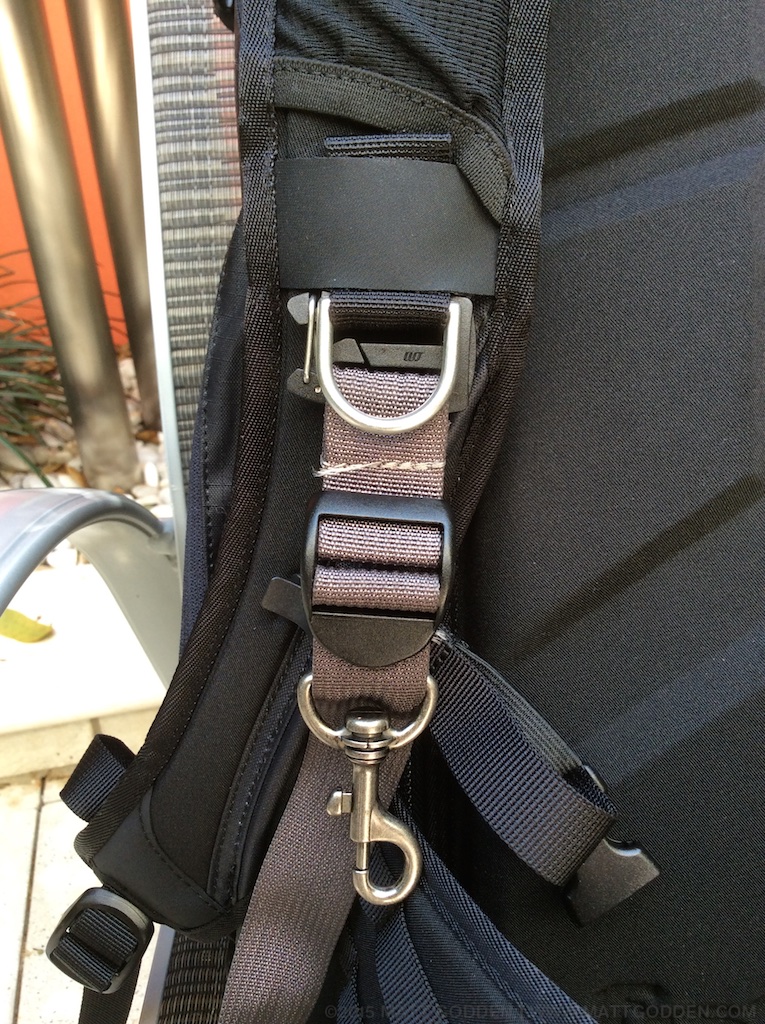
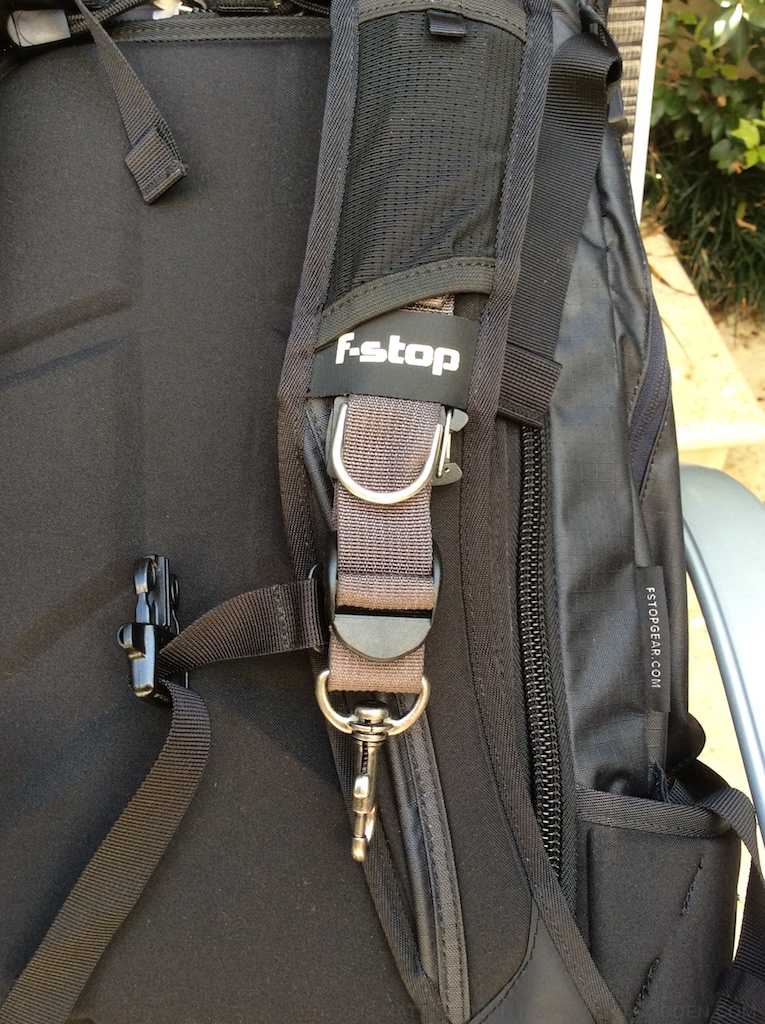
One of my favourite accessories, Thinktank’s Camera Support Straps, rely on the webbing rails on the shoulder straps of most packs. The Lotus lacks these, but thankfully, the webbing loop used for the built-in D rings is large enough that the clip for the strap can thread through it. As an added bonus, by rethreading the tag end back through, and up under the snack trampoline (there’s a springy pocket in the shoulder strap for snacks – I think that term is as good as any), it’s neater than on my previous pack.
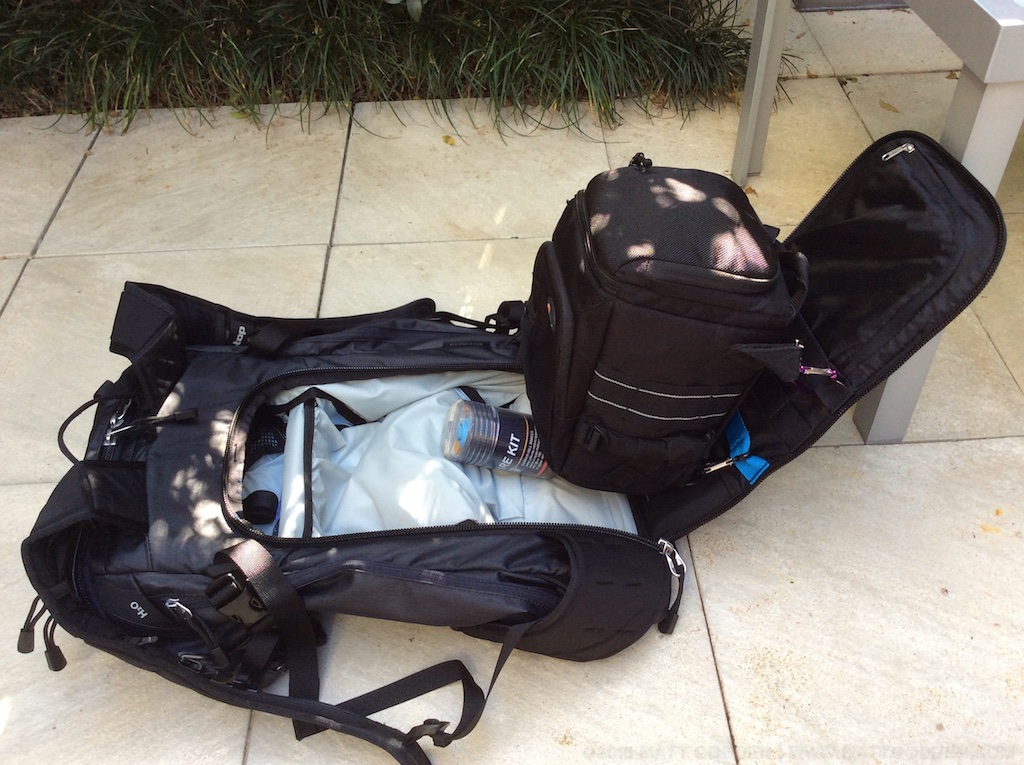
The other great compatibility feature is the molle webbing on the inside of the back panel. This gives you the flexibility to mount other bags inside the Lotus, as shown here, a Lowepro holster bag attached with carabenas (which I’m doing while I wait for a local dealer to get stock of the shallow ICUs). It’s not quite as elegant as an ICU, but it still means the camera can be accessed separately from the contents of the top of the bag.
Conclusion?
It’s been a couple of days of carrying this around all the time. The Lotus is a bigger bag than I’m used to, but small enough that I can adjust to that, for the freedom to have a well designed bag to constant carry a couple of kilos of camera and lens. Also worth mentioning, the pockets in the lid, one accessible from the outside, one from inside, are spacious and majorly convenient for getting access to a lot of stuff without disturbing the inside of the bag. Further on the topic of the lid, it’s attached to open away from you when the pack on on your back, which means the zips can sit near your neck, away from potential pick-pocketing.
So, overall, my initial impressions are that this is going to be a serious piece of kit. It’s got its quirks (like the 14-24), but my gut feeling is that it’s going to be a tremendously enabling piece of gear.
If this article was of use, a donation would help support my projects.