Everything is finished. Hard to imagine, but working up to the last minute, everything was ready. There were some hiccups with getting the branches connected after braiding, but I eventually discovered a way of connecting them that avoided actually cutting the braid. The first wrap up of the braid around the branches didn’t quite work out the way I wanted, and ended up with big knots over the joins. So, I unwrapped and re-wrapped, creating a much leaner, smoother appearance.
Week 42 of 52
Work continues on the UWS piece. It’s hard work, slow work, hot work and dusty work, but it feels like it’s coming together. The branches are being attached and the skin is going on. It requires significant precision, without much room for error. With luck, the final two branches will go on Tuesday, and that’s the serious work out of the way.
Longer diary entries will be along once this major work is out of the way.
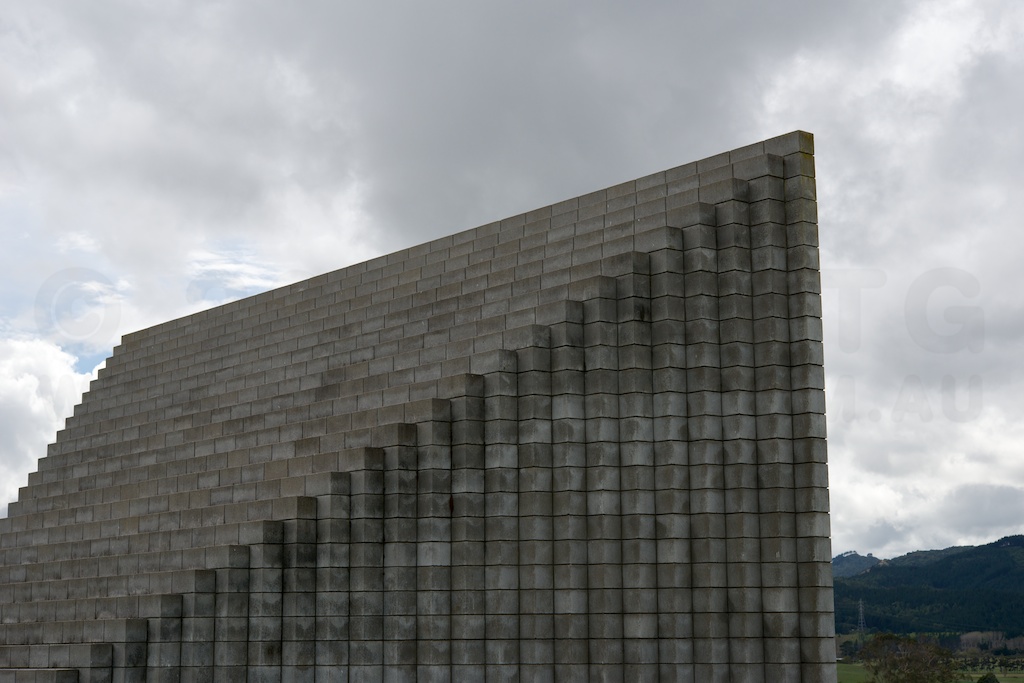
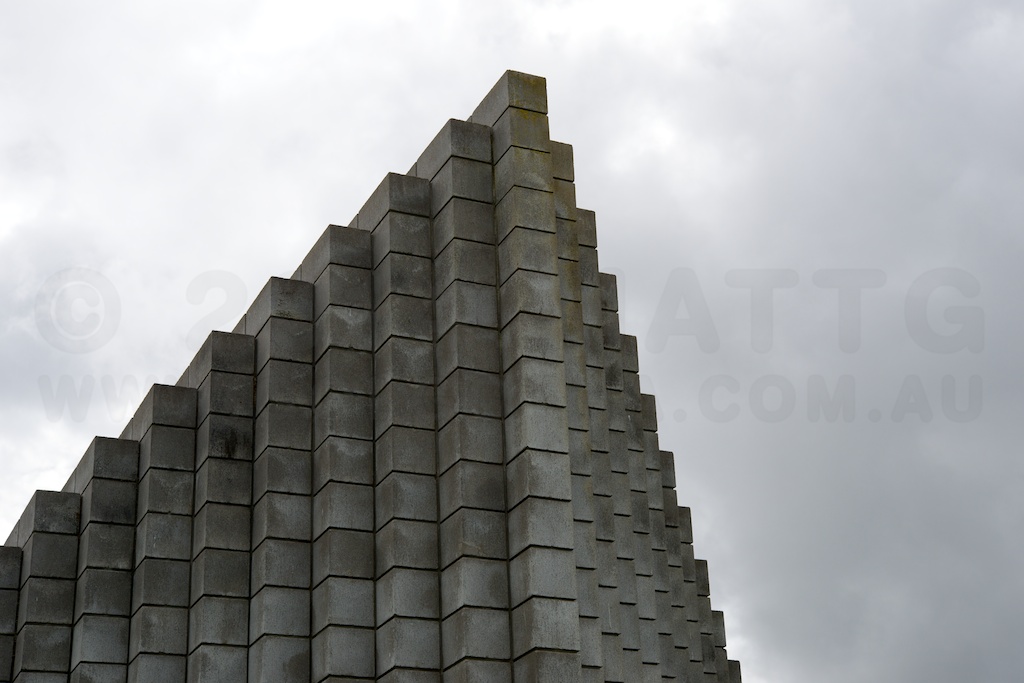
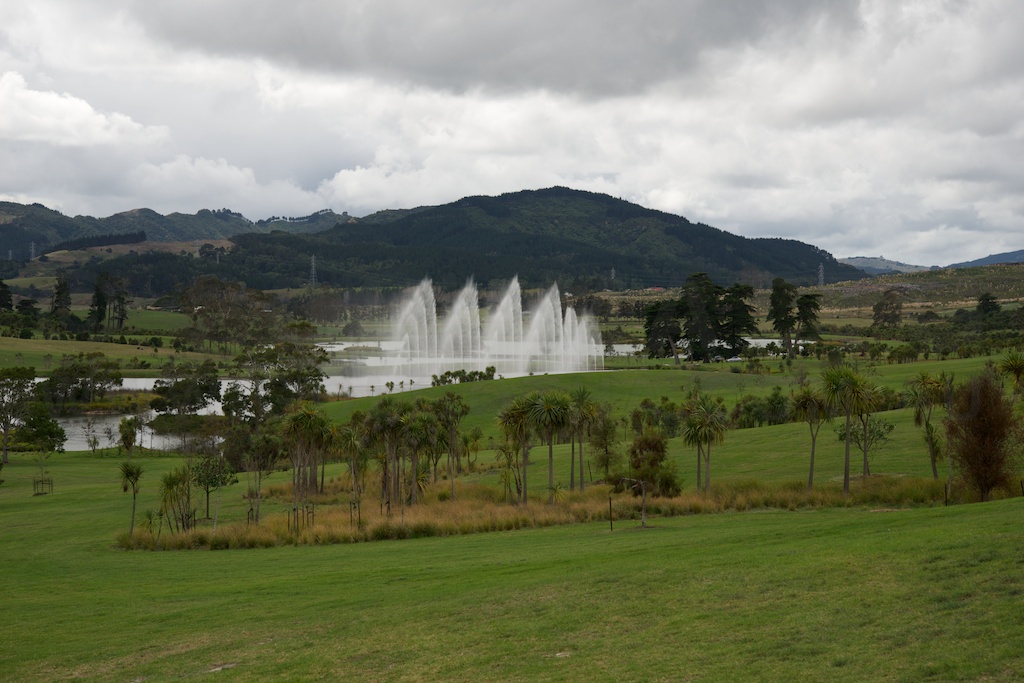
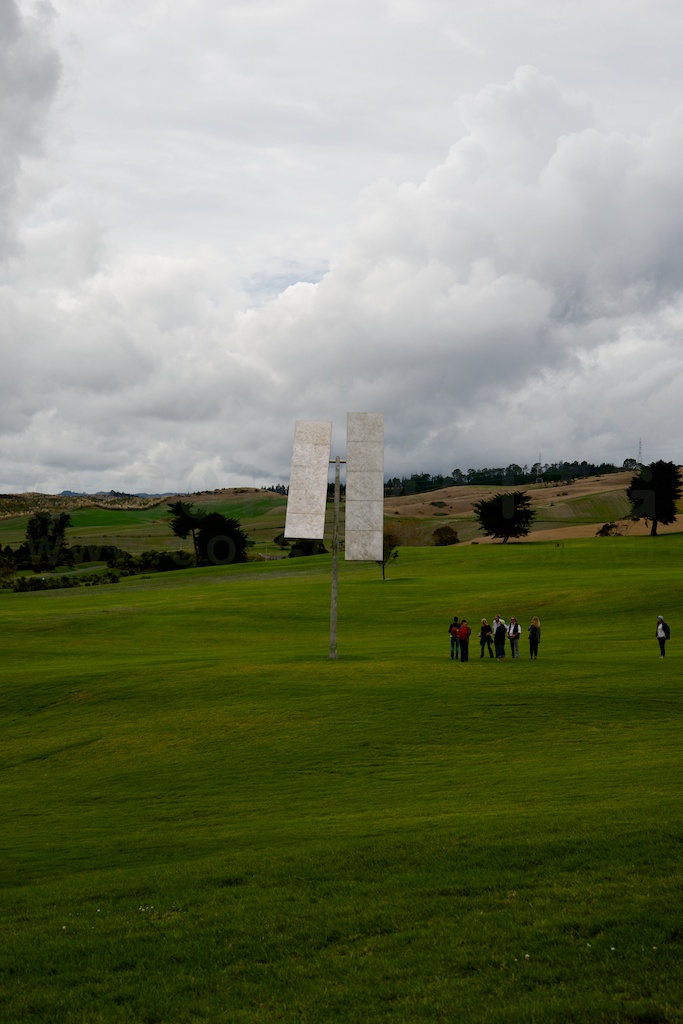
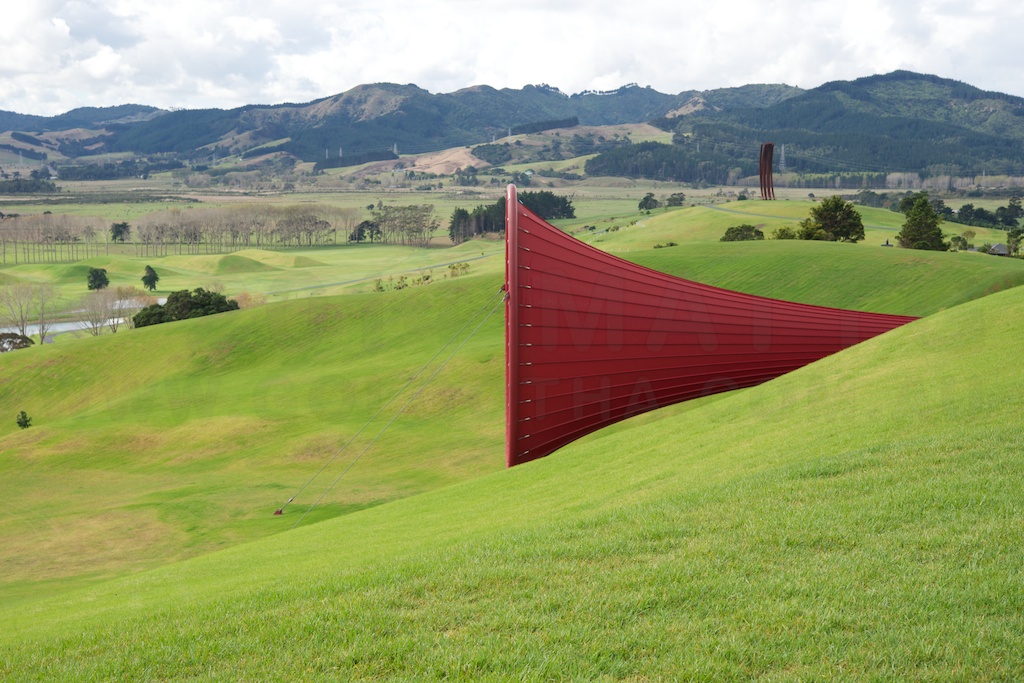
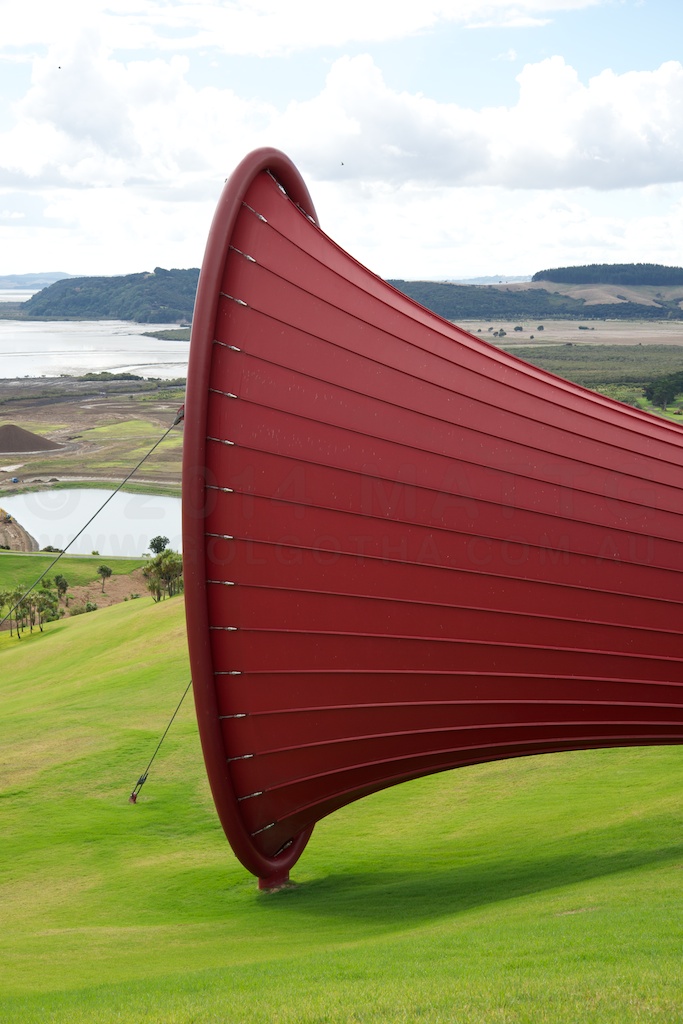
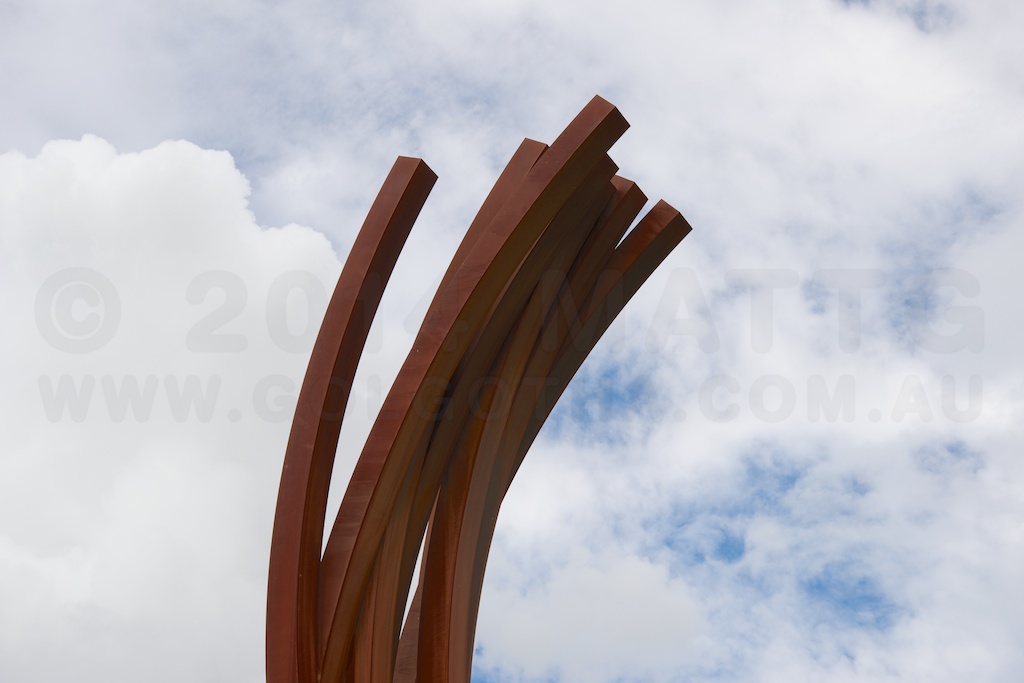
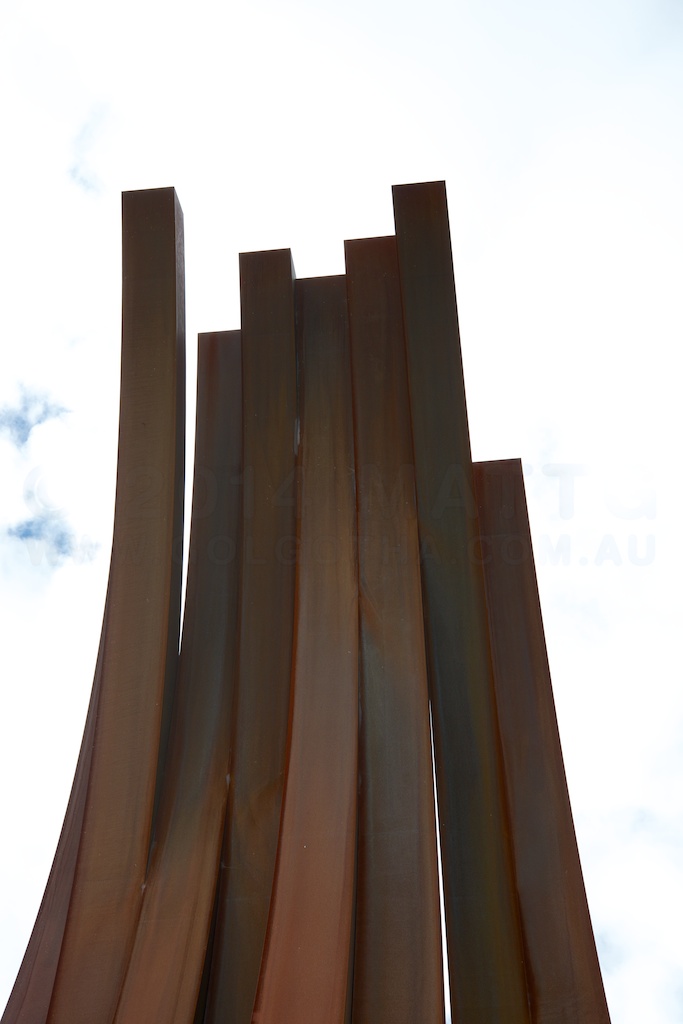
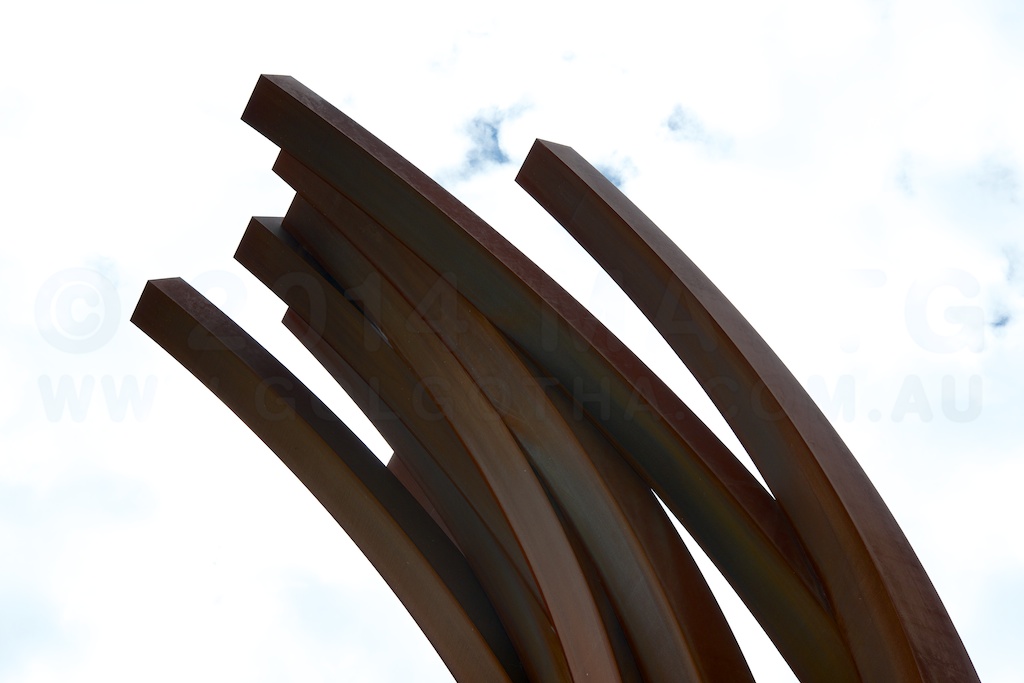
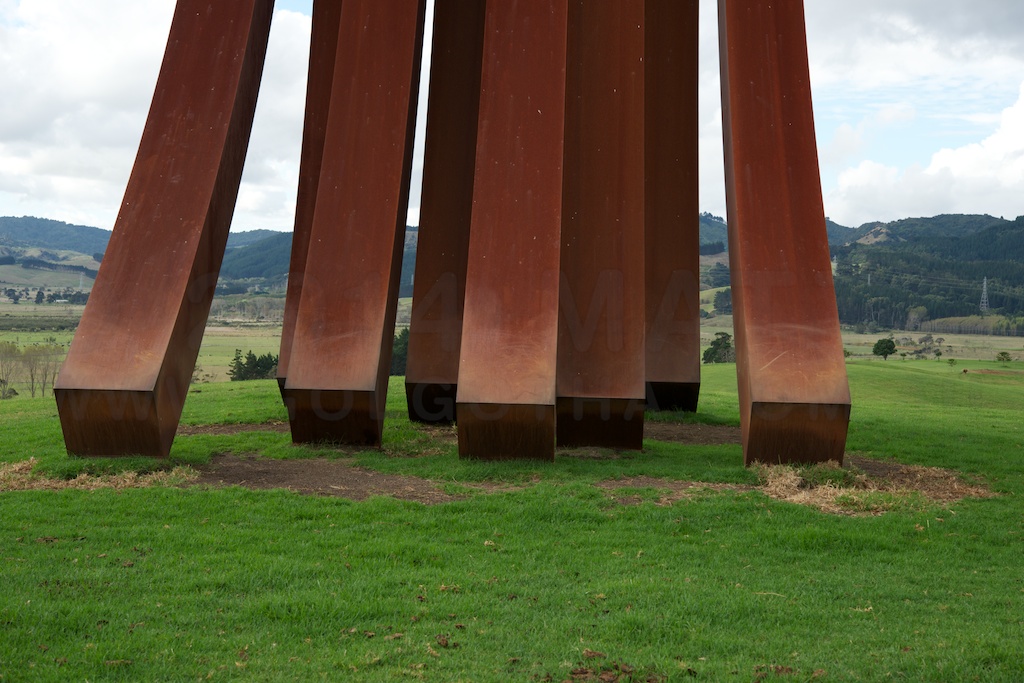
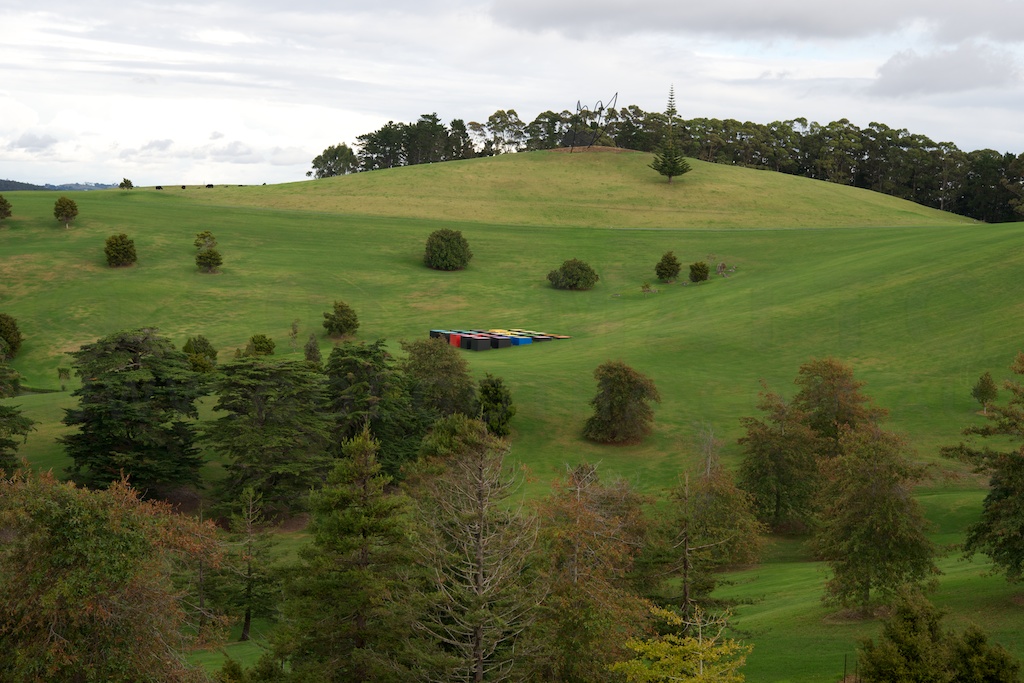
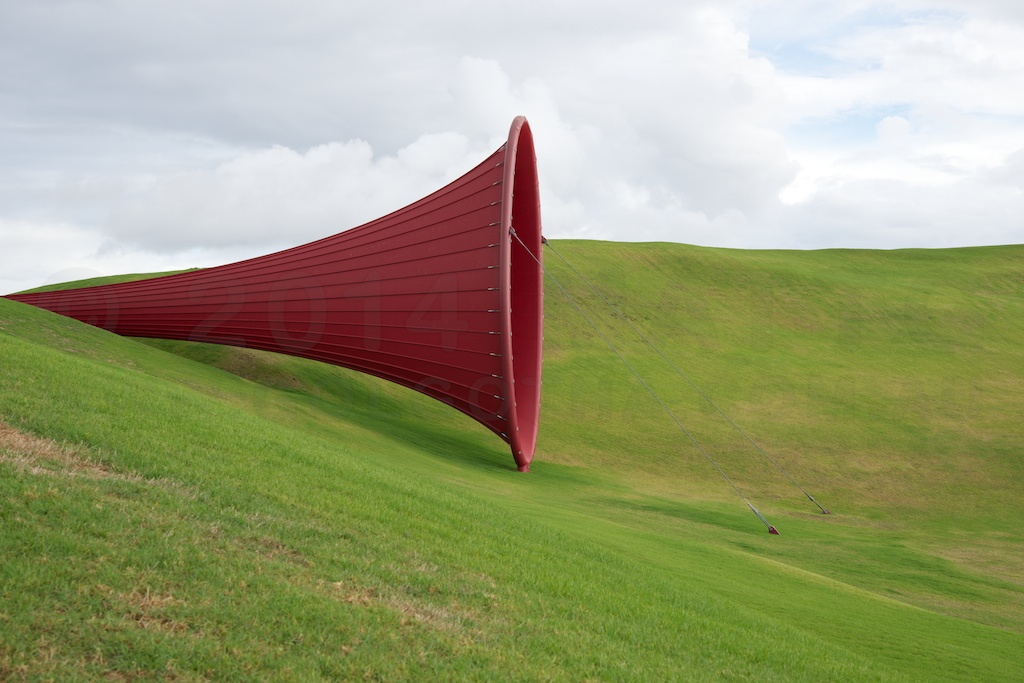
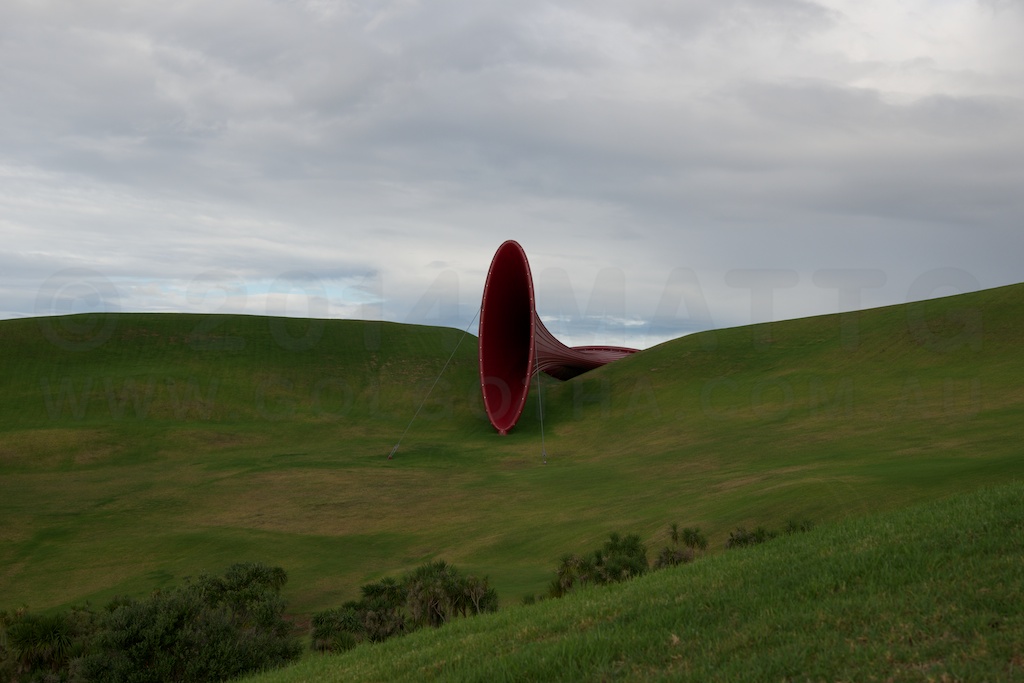
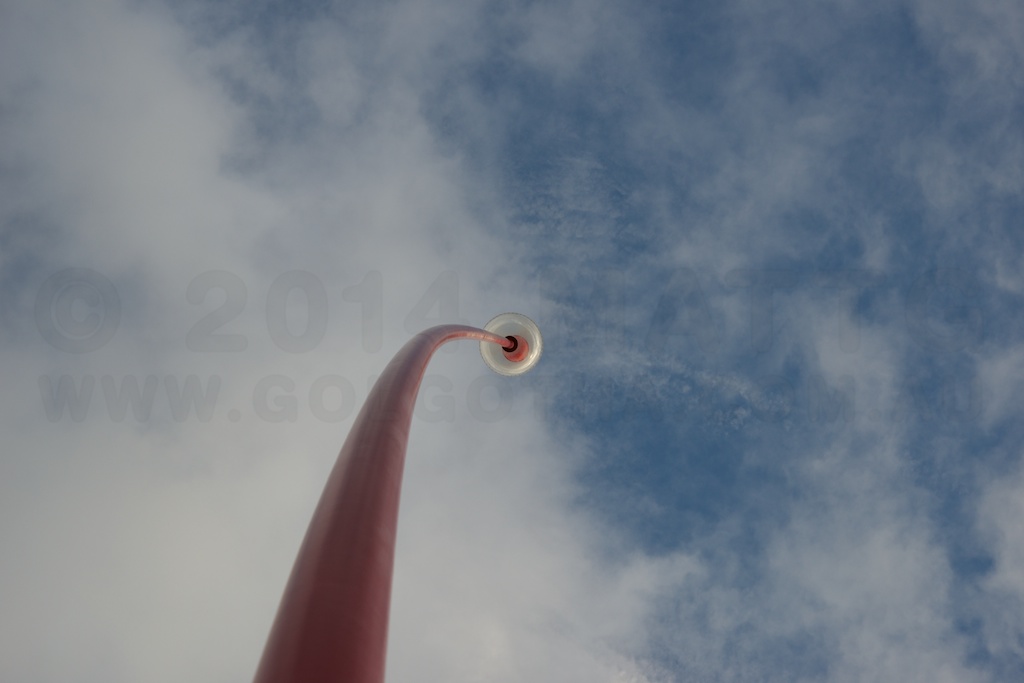
Gibbs Farm
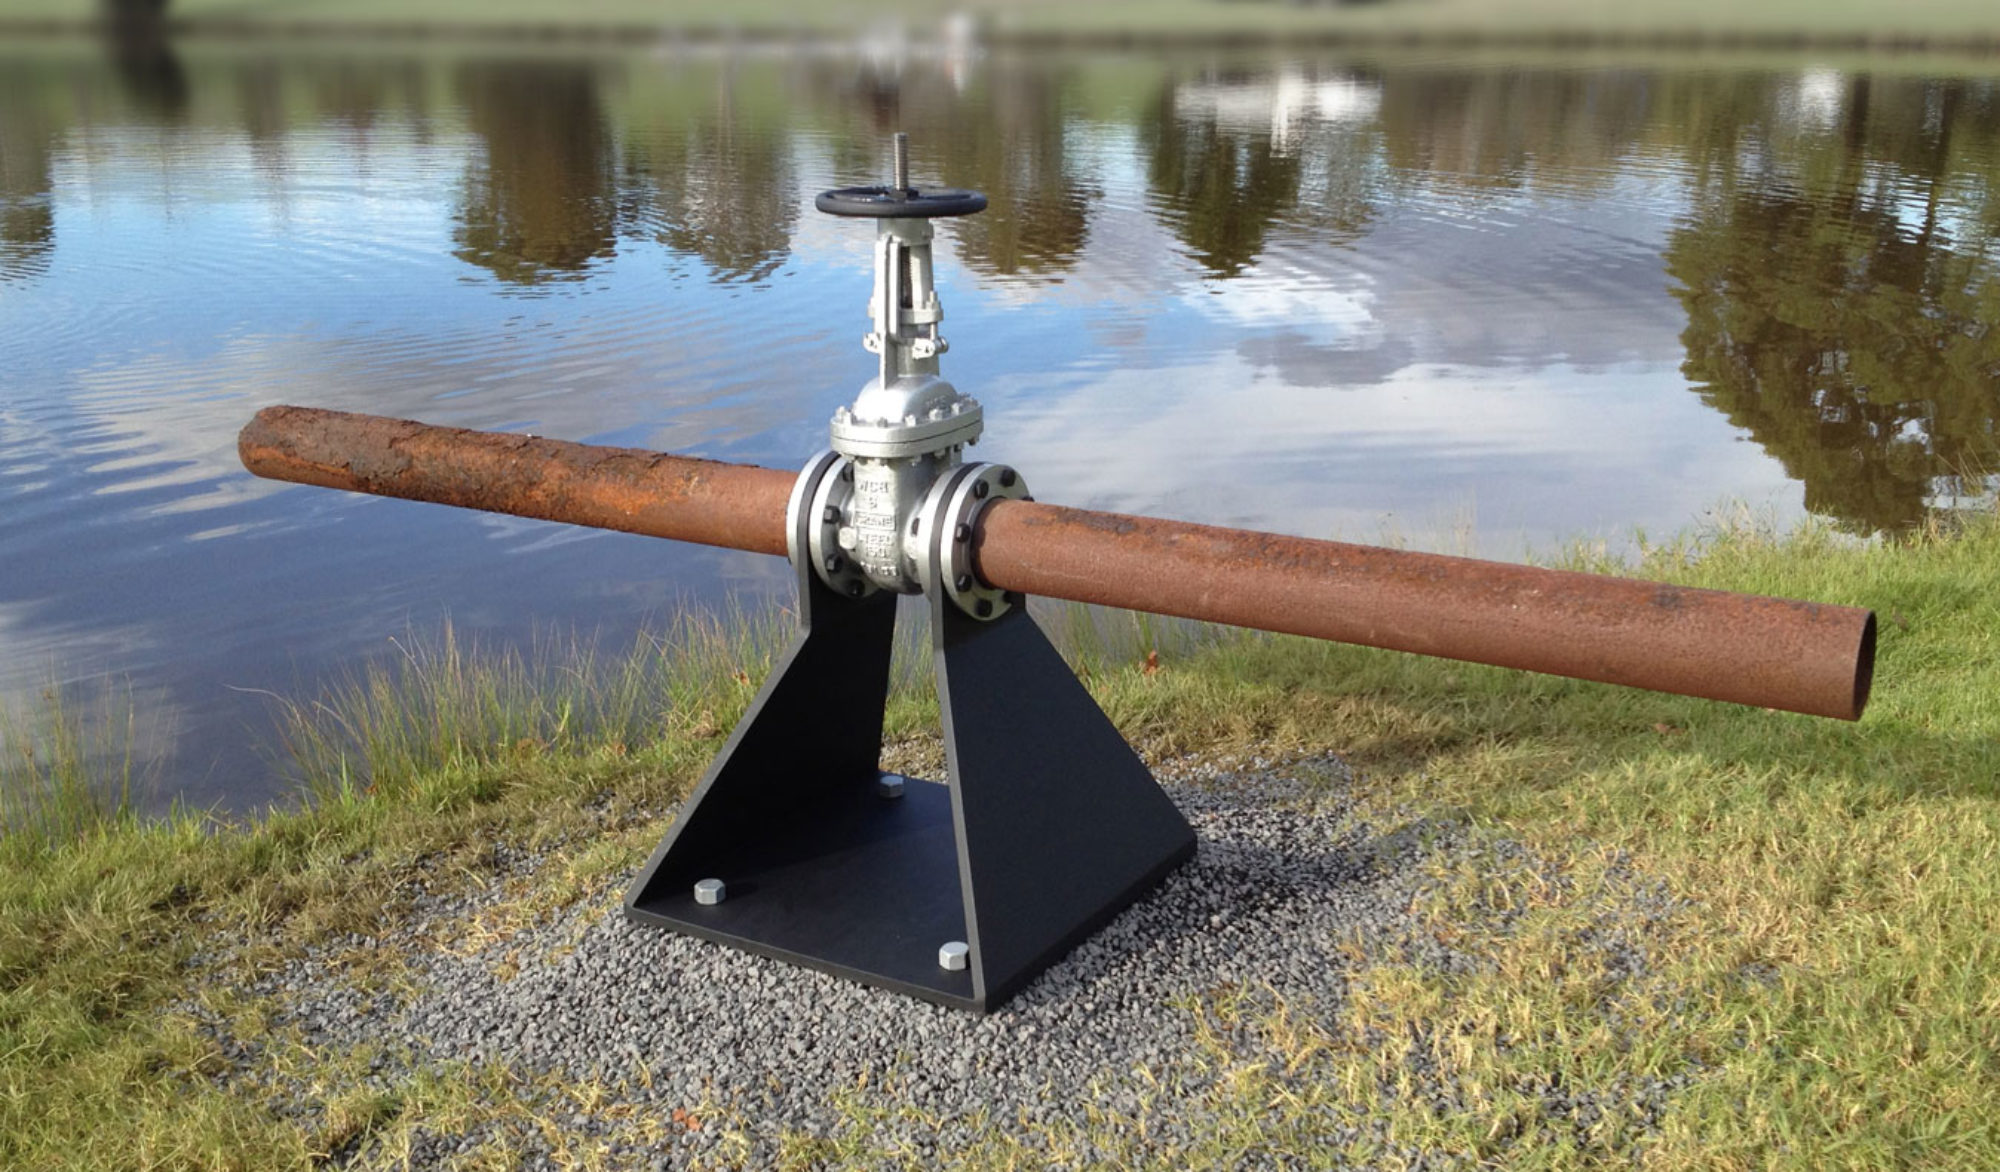
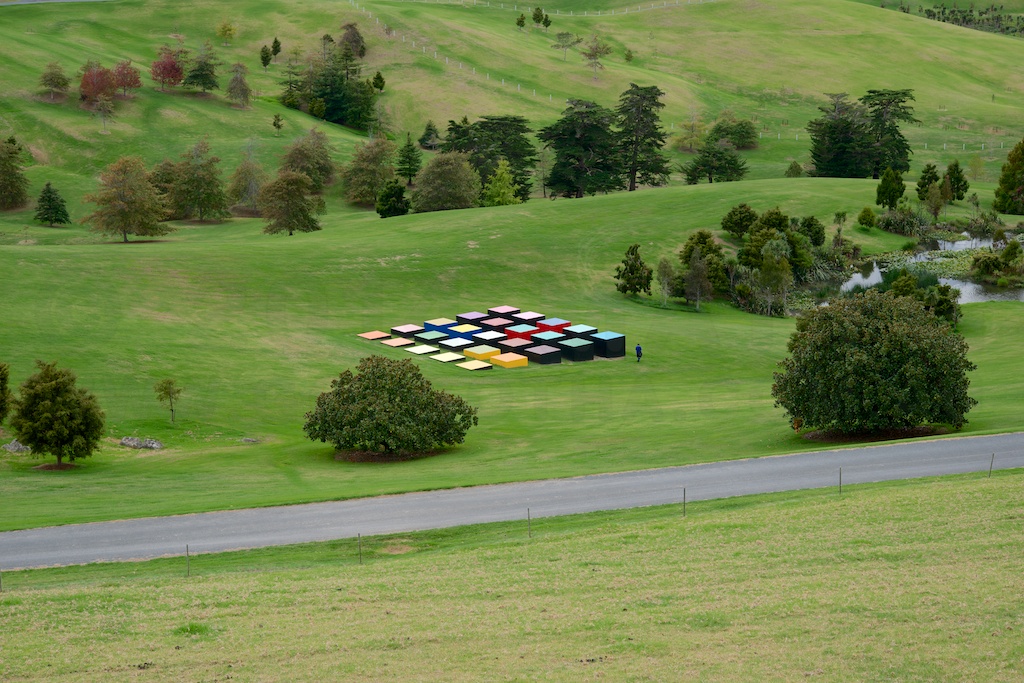
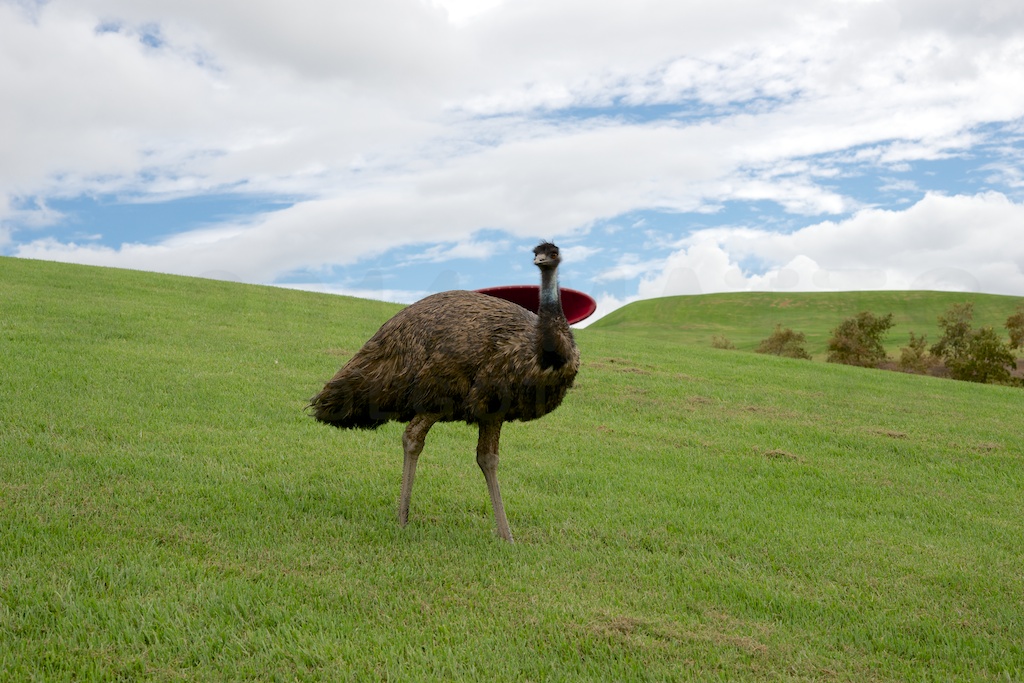
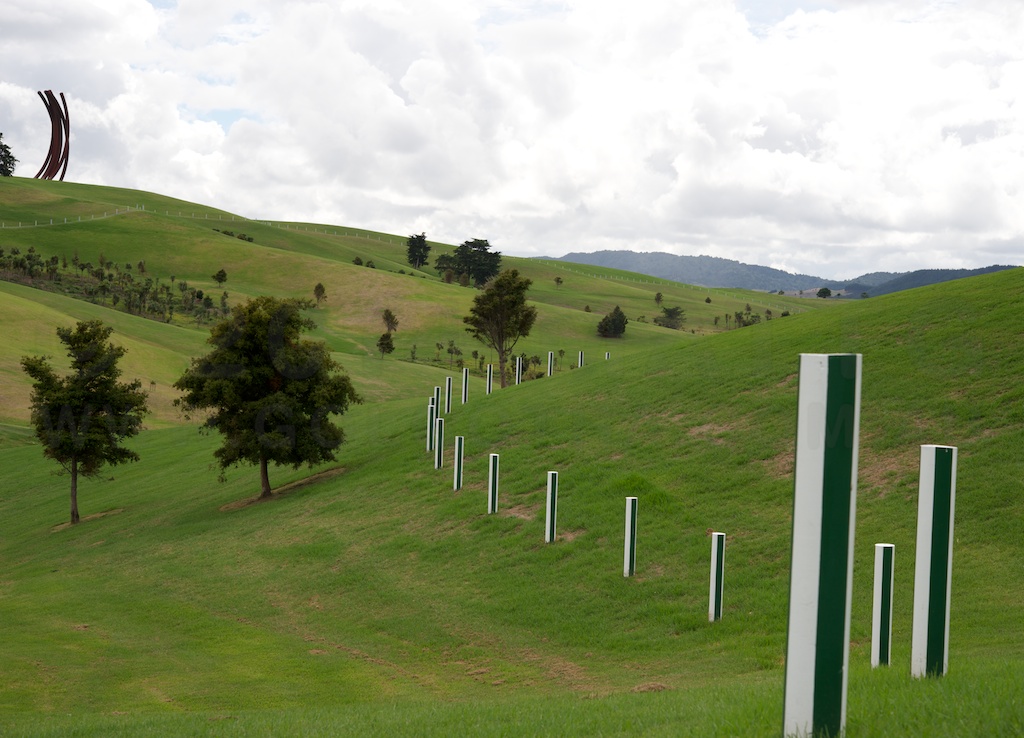
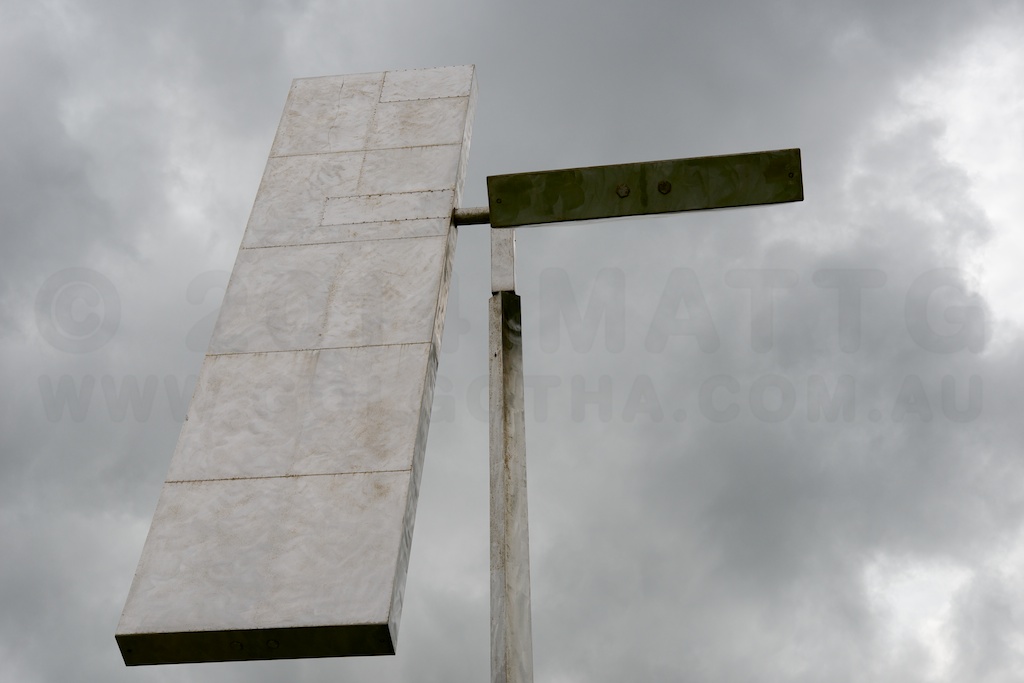
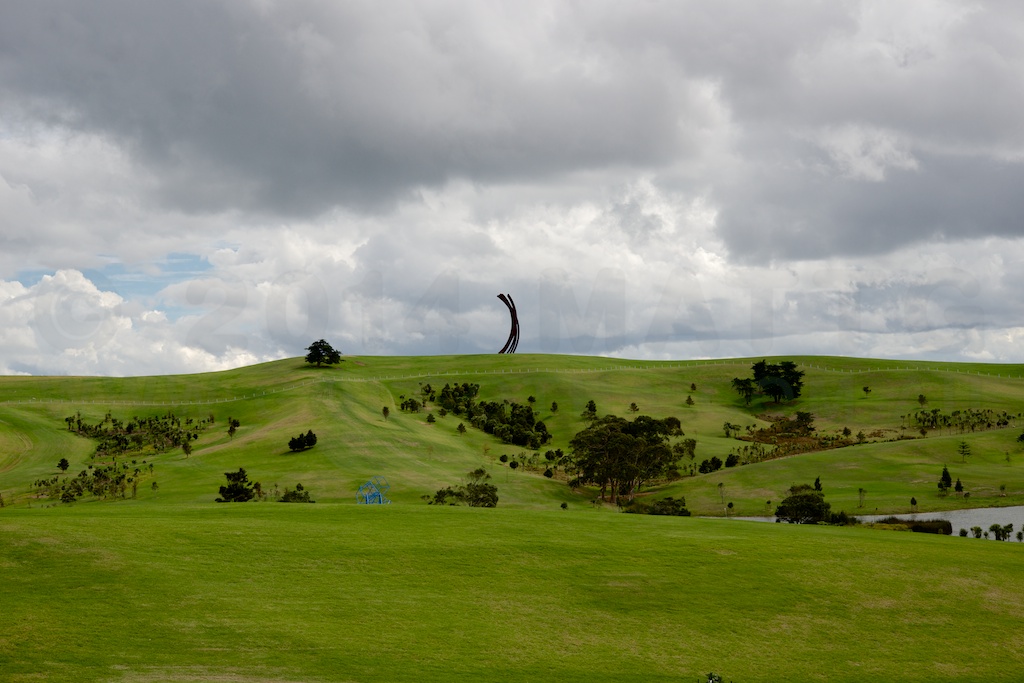
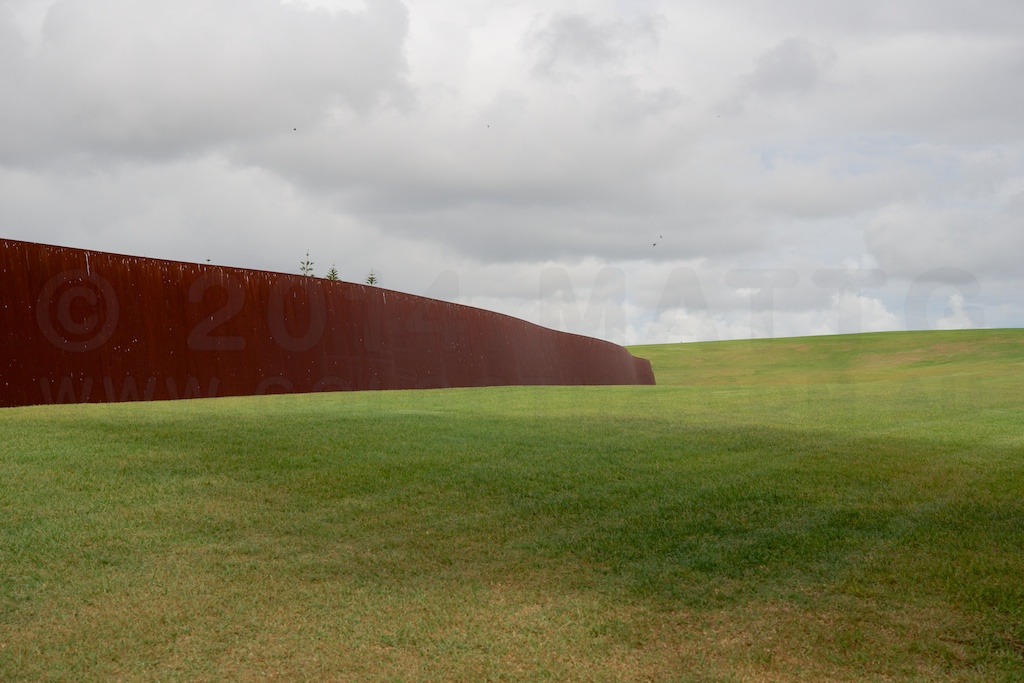
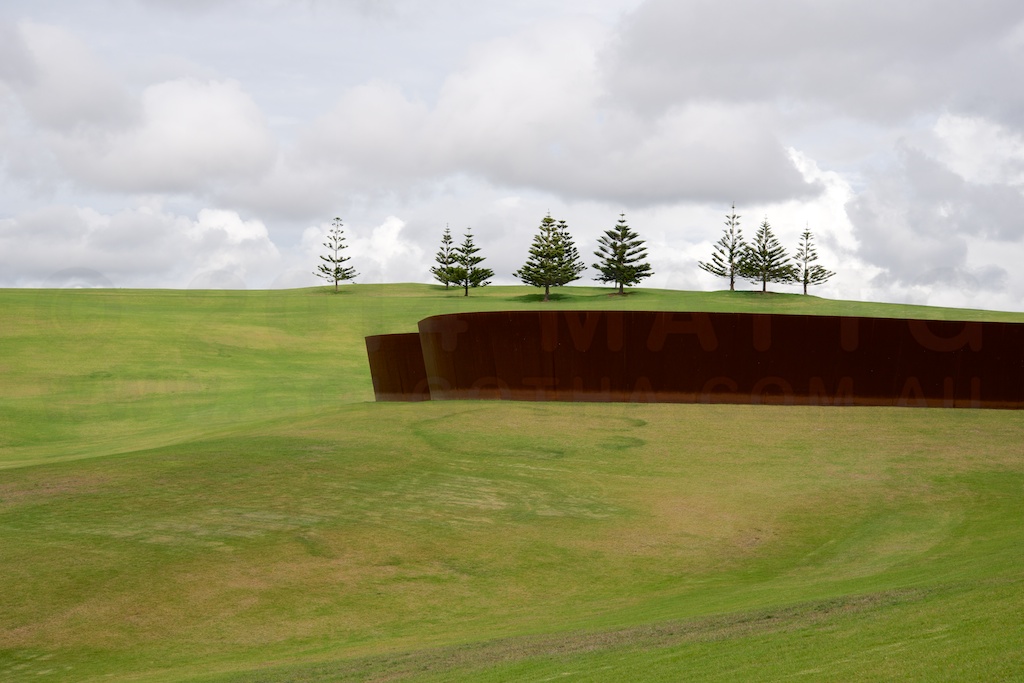
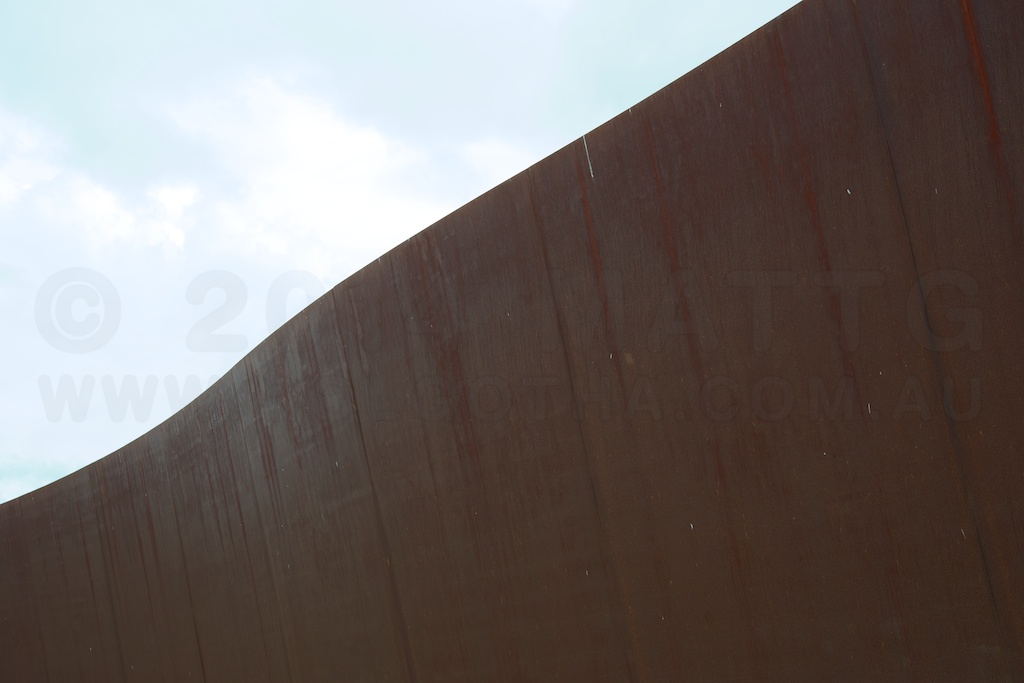
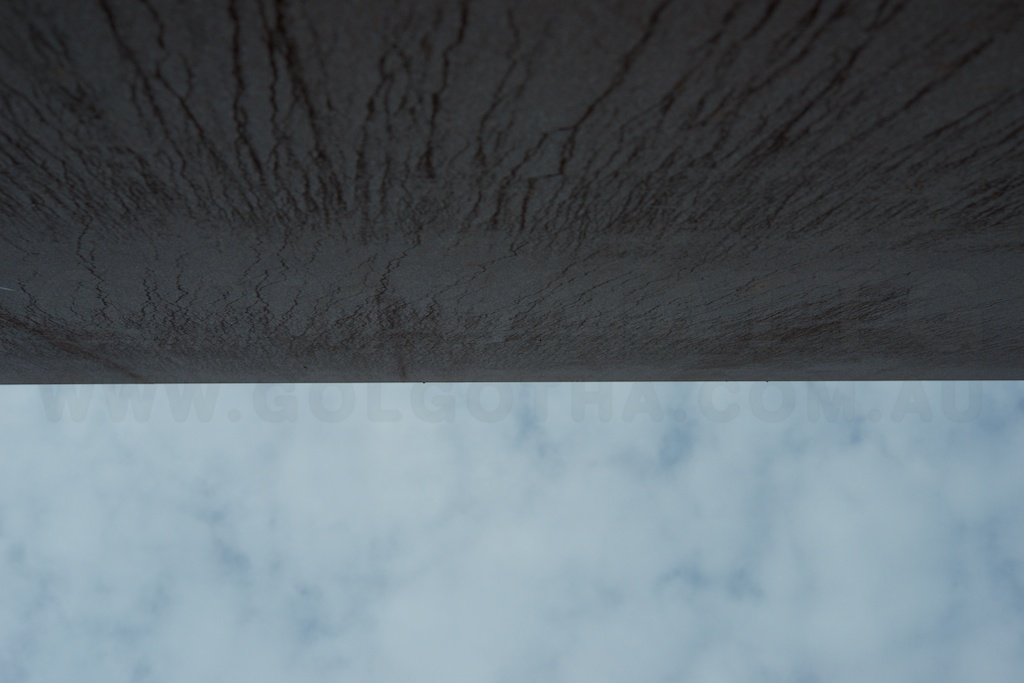
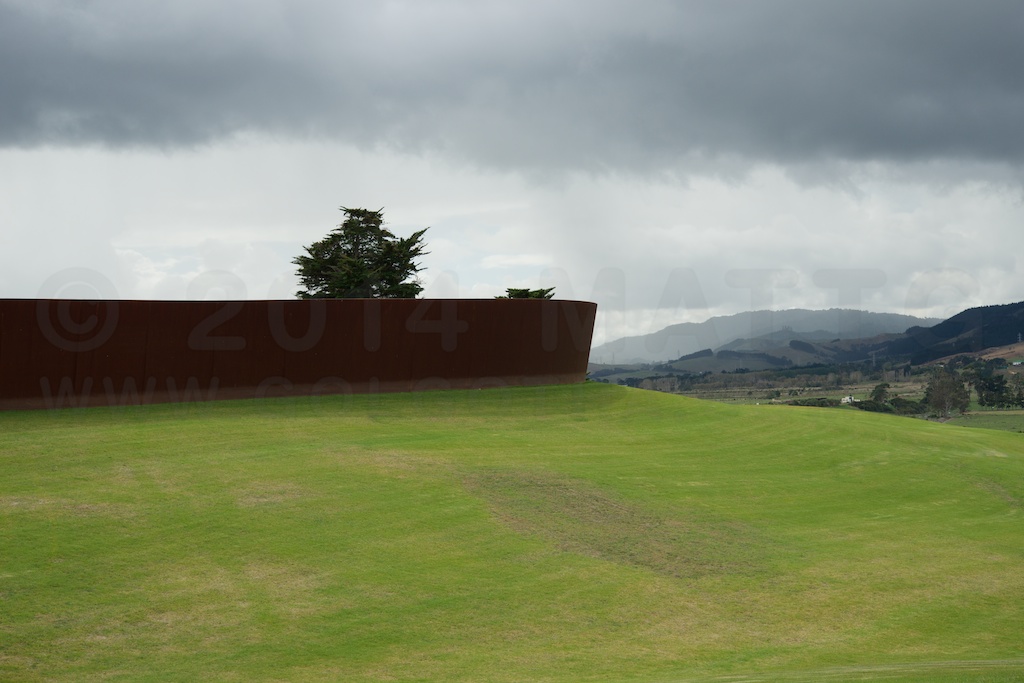
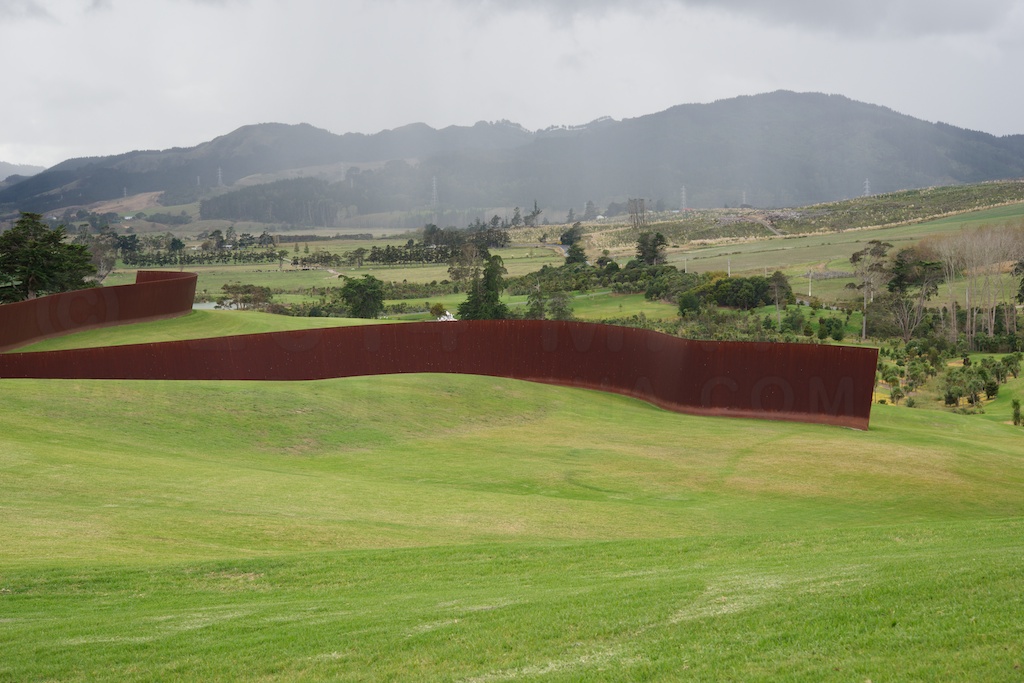
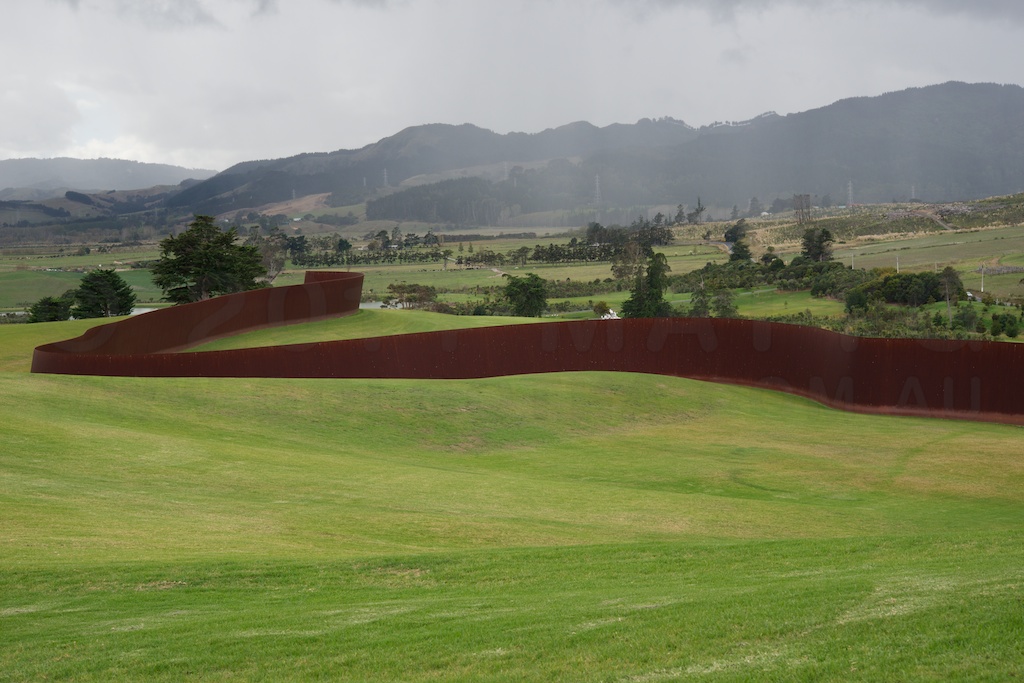
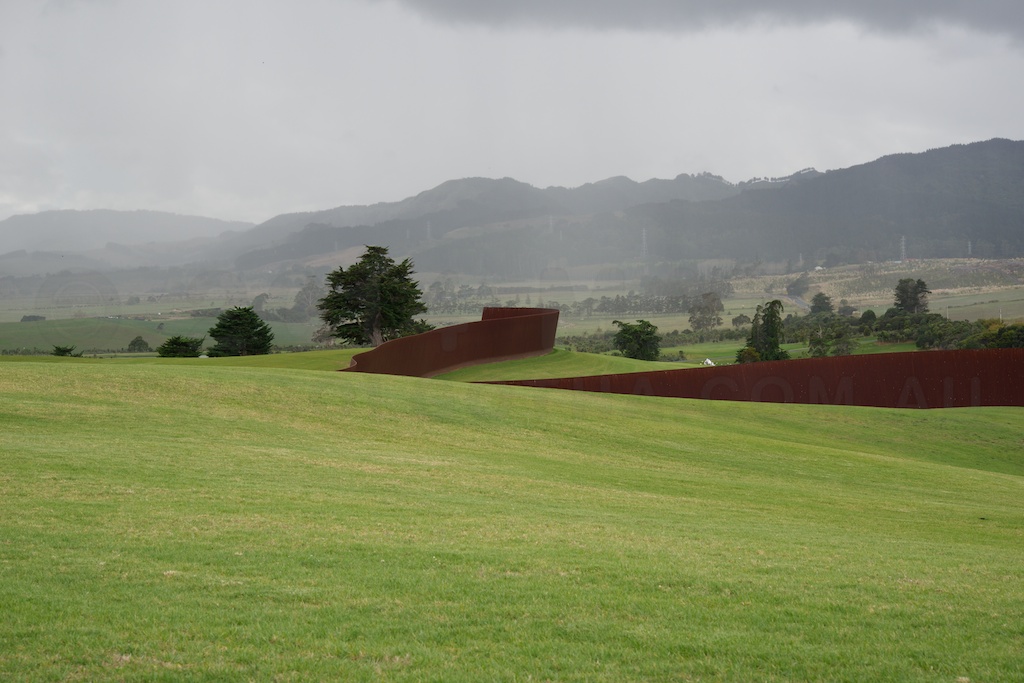
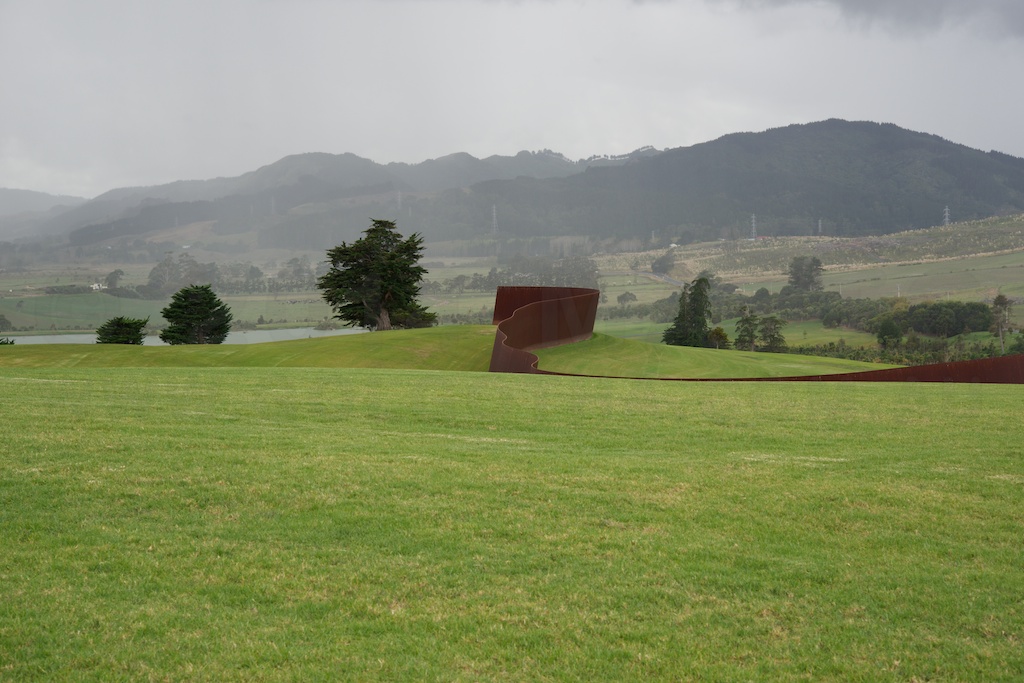
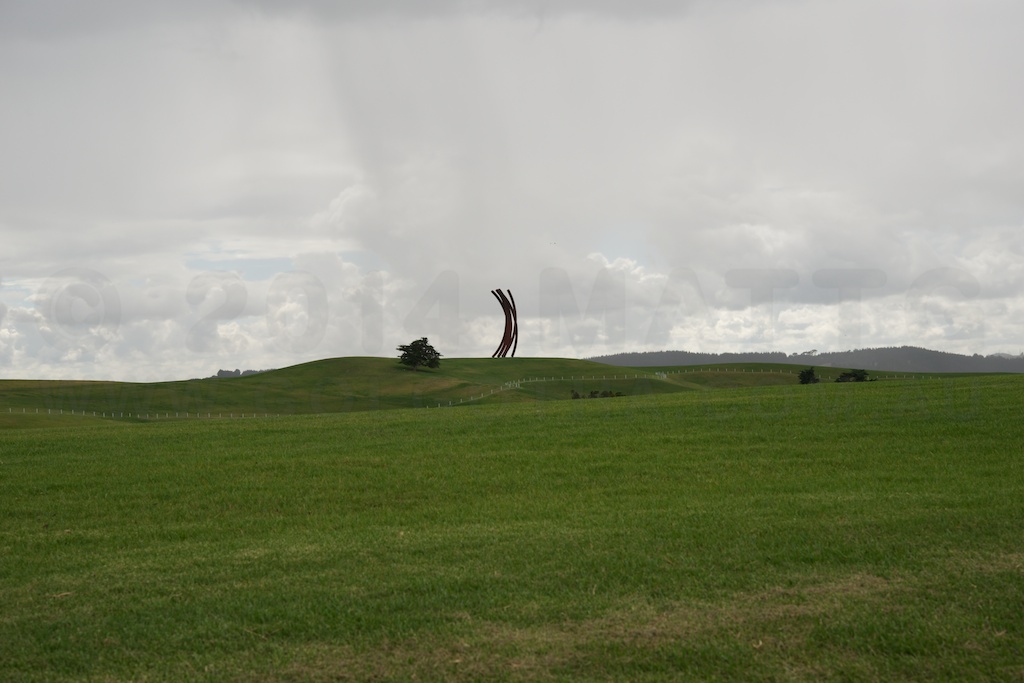
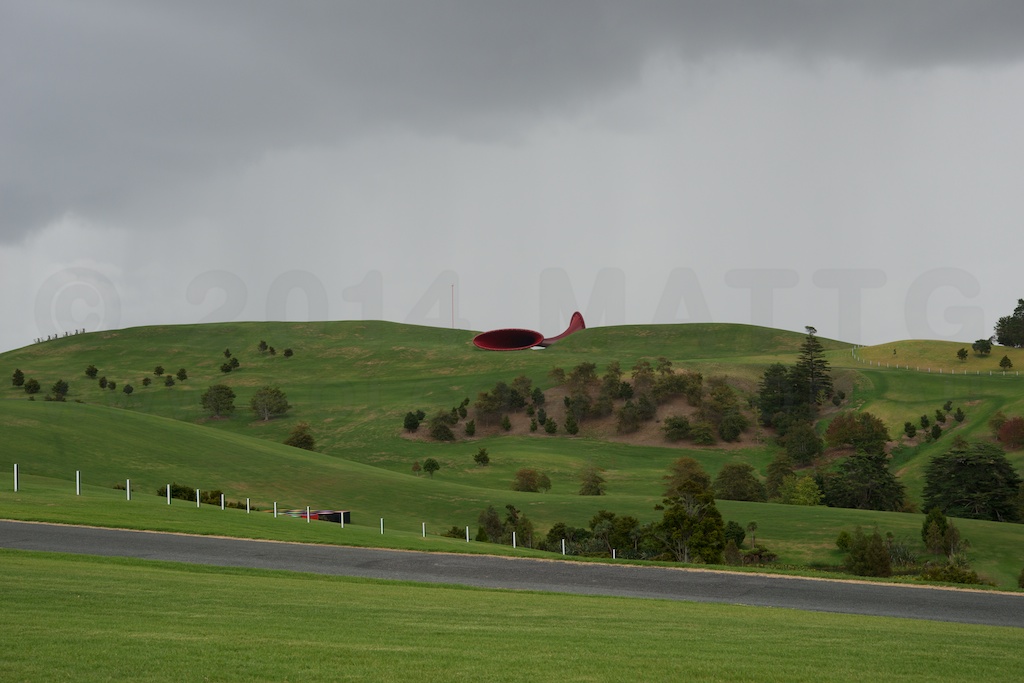
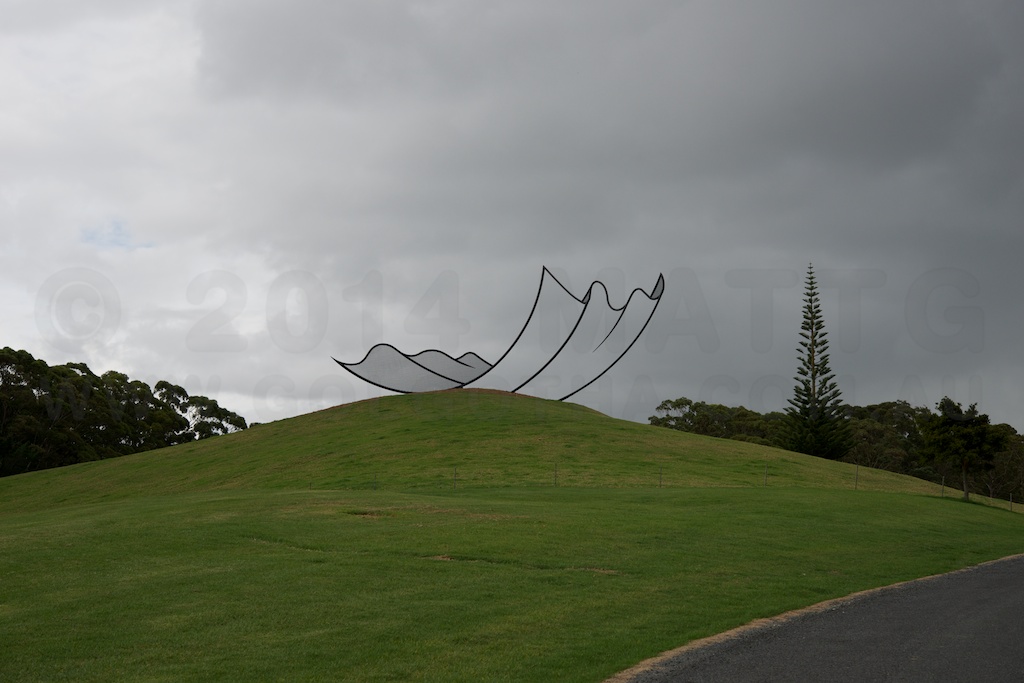
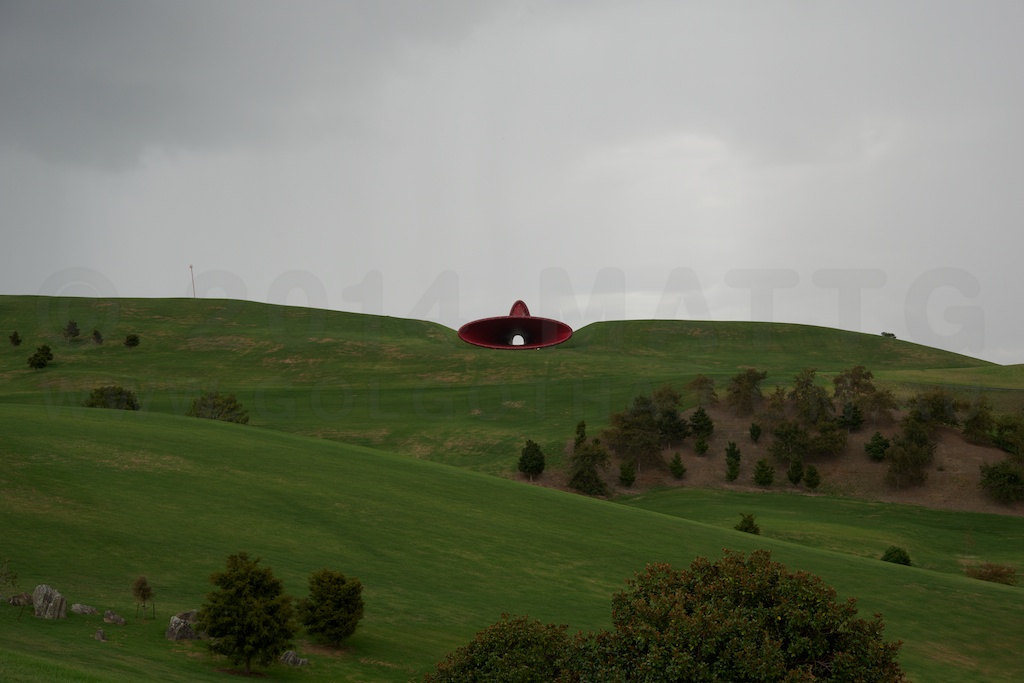
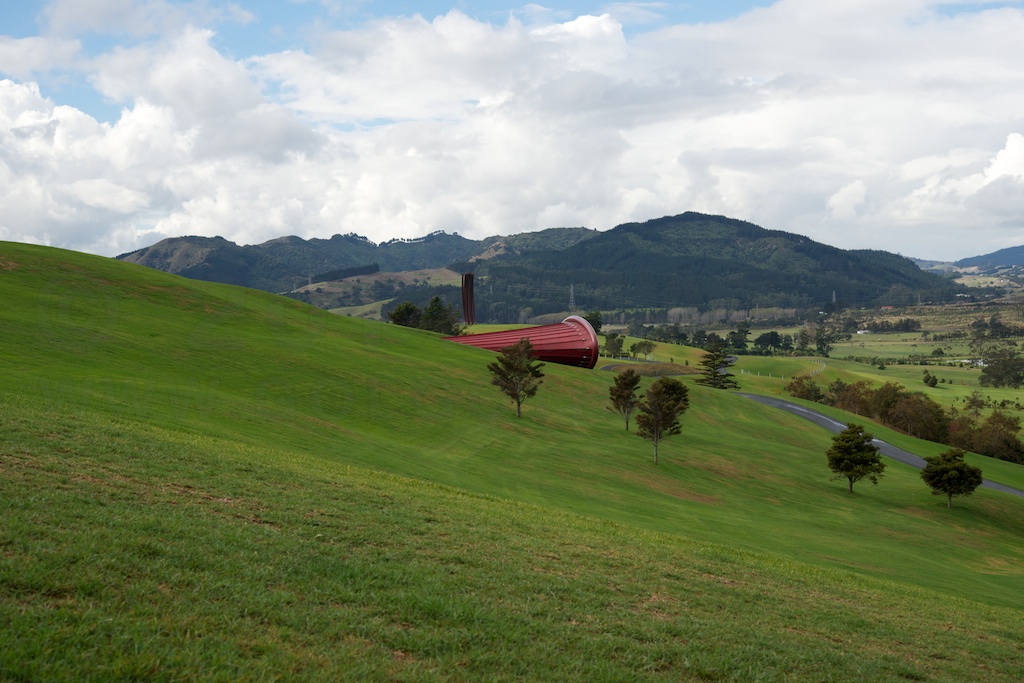
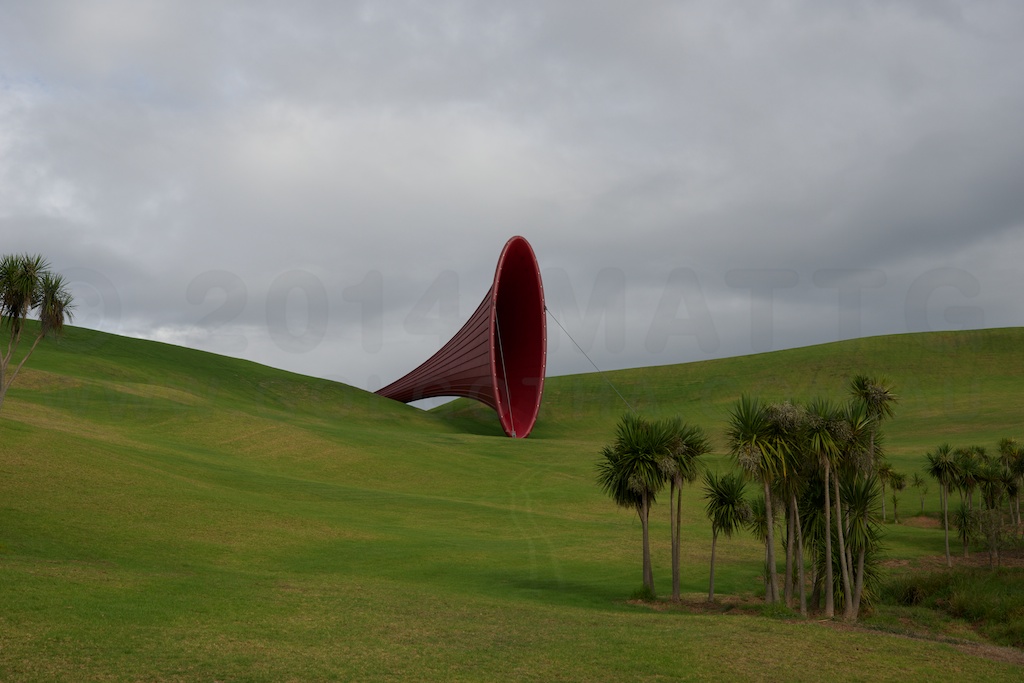
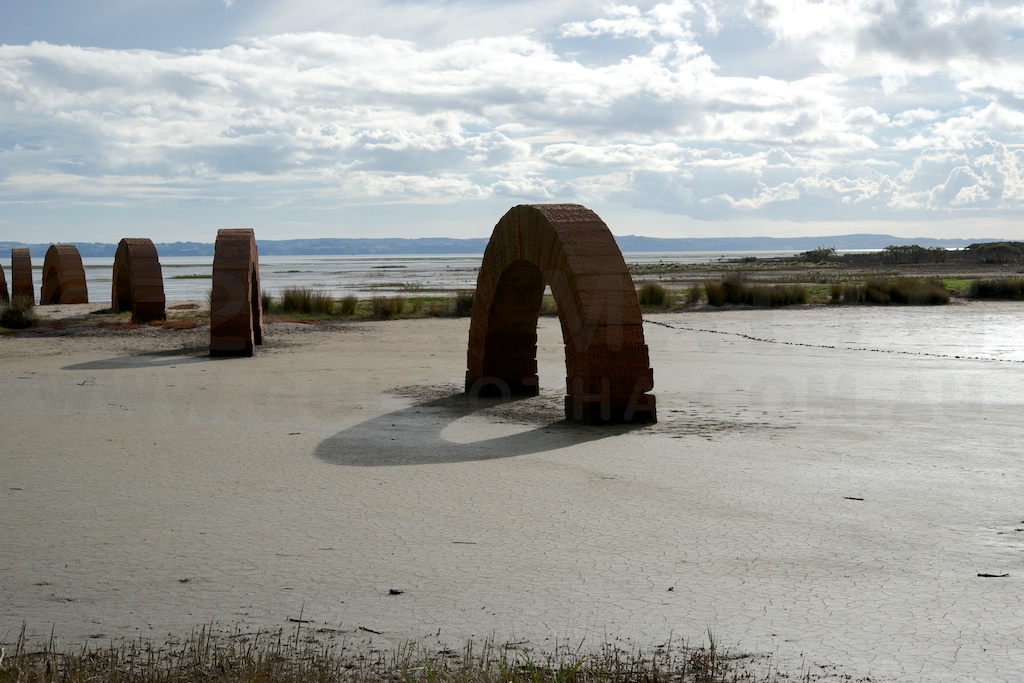
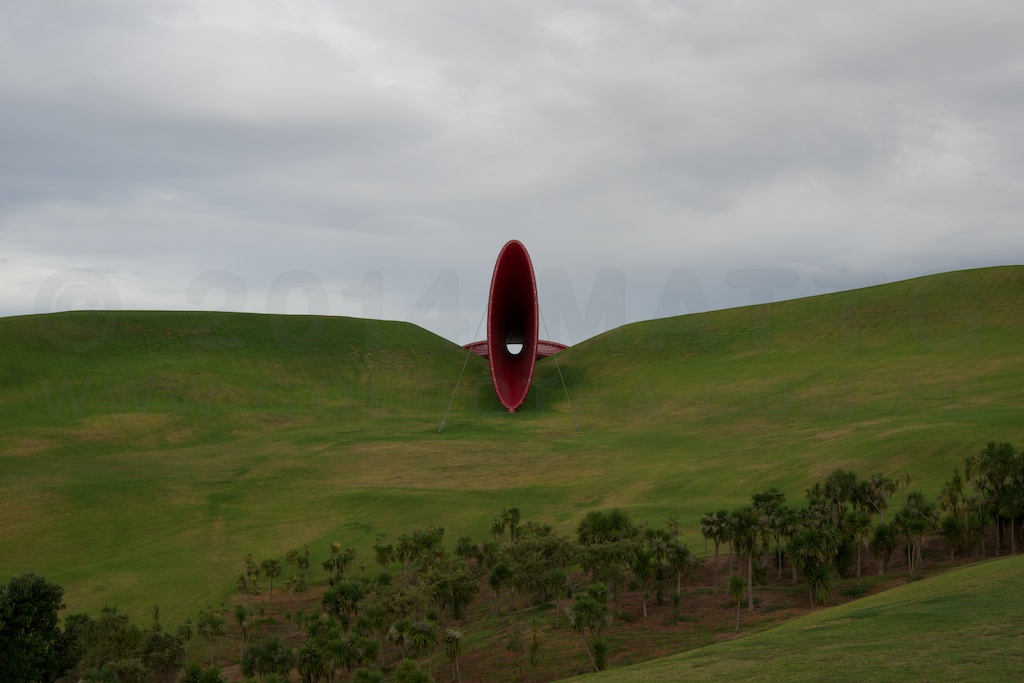
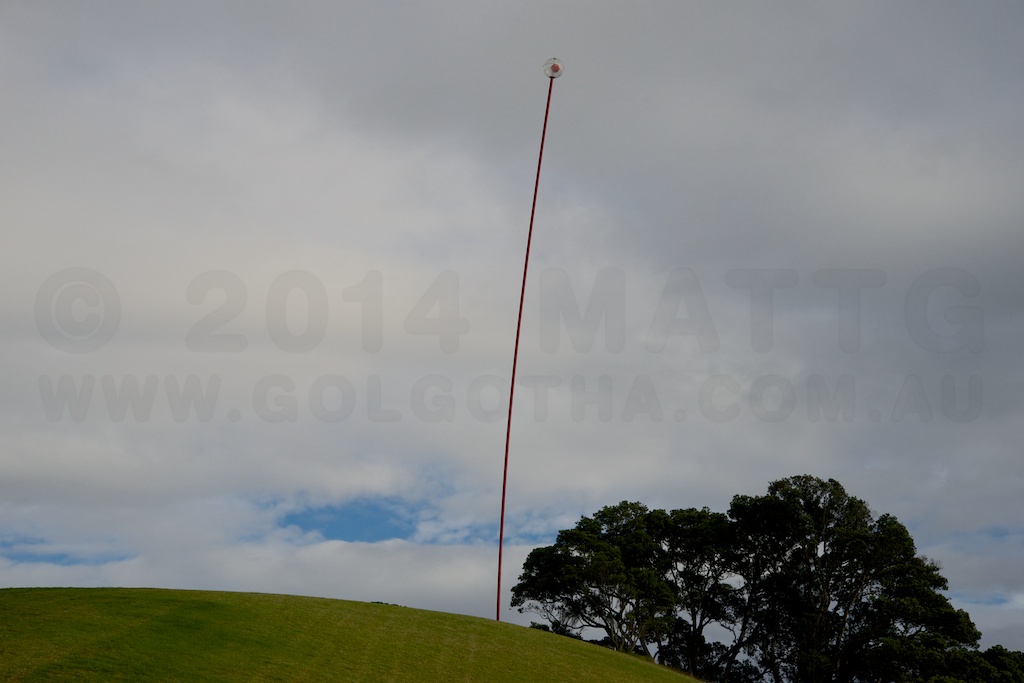
Images from my tour of Gibbs Farm in New Zealand.


Week 41 of 52
A week of travel and deal doing.
So in going to get my stainless steel on Monday, I hit upon an idea to call the makers of a welder I’d been thinking about a year or so back. I spoke to the owner of the company, ad he mentioned a model that wasn’t on their website, their crappy un-updated website. Hello. So I suggested that perhaps he’d consider a swap – a new website for a welding machine.
So, on Tuesday I went out to their head office, and picked up the welding machine, and since it was near UWS, made a quick site visit. Wednesday it was off to New Zealand, where I visited Gibbs Farm.
This was a real pilgrimage – being able to stand next to, and touch giant works by Anish Kapoor & Richard Serra.
The other two days there ere spent doing touristy stuff – walking around Auckland, and taking ferry tours.
Sunday was dedicated to getting the electrical supplies necessary to get the welder up and running. All going well, I should be able to begin next week.
Week 40 of 52
Disaster!
The armature I was building for the top half of the UWS piece has turned out to be a failure. The material wasn’t up to the weight demands, and sagged to the point it wasn’t viable.
So, with 3 weeks to go, one of which will have 4 days going to New Zealand and back, I’ve got to find another solution. I’m thinking it’s going to be stainless steel pipe, cut with lots of slots, then bent and welded. back together.
I’ve priced a small welder that’ll run off domestic house power, and which should do the job. So in the 2 days before I go away, I’ve got to get stainless steel organised, get a welder organised and gear up for a new and expensive addition to my practice.
Argh.
Week 39 of 52
The base of my UWS sculpture is complete, and the new, responsive version of my website has gone live.
The other news is that my second review has gone up, this time for the Adonit Jot Touch 4.
Review: Adonit Jot Touch 4
Opening disclaimer: I have previously purchased a Jot Touch 4, and an original Jot Touch. The first generation model has unfortunately been made obsolete by changes in iOS 7, and so I was provided with a “keeper” review unit by Adonit, and Mobile Zap Australia, as a replacement.
 As an artist, and one of them “Readers”, my kit for whenever I was out of the house day to day usually contained the following:
- A4 Sketchbook.
- Blue lead mechanical pencil.
- Graphite mechanical pencil.
- Eraser.
- Paperbook novel.
When the iPad came into my life, I had the chance to consolidate, and the linchpin for all of this, and indeed the one missing part of the iPad puzzle that allowed me to adopt the platform, was the Jot Touch 4.
The Jot Touch is an iPad stylus which, uniquely when it debuted, provides pressure-sensitivity much like that of a Wacom tablet. It’s a genius solution to the problem of iPads not actually being pressure sensitive – the iPad natively tracks the location of the touch from the stylus tip, and the pressure information is measured in the pen, then communicated in realtime over Bluetooth.
To get the benefit of this, one needs a Jot enabled app, and my weapon of choice at the moment is ProCreate. If you click on the image above, what you’re seeing is a single tool – the 6b pencil, with no adjustments made during the entire drawing session. Everything there comes from the range of pressure available in the pen. It’s been a while since I did any repetitive drawing exercises , but the range of thin and thick strokes, variations from thin to thick and back, and ability of the pen to reliably keep up with my fast scribble drawing style mean that this tool is in every way a capable replacement for analog drawing implements.
Now, obviously a question that’s going to arise is what it’s like compared to an actual Wacom tablet. Adonit list the pen as recognising 2048 levels of pressure, much the same as the current desktop Wacom technology, and possibly more than many of the “Wacom enabled” tablet devices out there. For me, however it comes down to this – how good is your muscular control, that you could be that subtle in pressing on a pen? You can see some jitteryness and straight bits in loops in the image above – that’s entirely down to me and my less than rock-steady hands.
In terms of the hardware itself, The construction quality is utterly sublime. The stylus has a cylindrical aluminium barrel in charcoal or a deep lustrous red, and a rubber coated grip area with two buttons that can be mapped to control various functions. Between the buttons is a status LED, which glows red while charging, and green to indicate switch on, or charged. The cap screws off, and can be screwed onto the base when in use. Under the cap is the nib itself – a biro-fine metal tip ending in a clear plastic disc attached in the middle with a ball & socket joint.
This combination takes a moment of acclimation, and a bit of care when the lid is off. Once you start using it however, the ingenuity of the solution becomes apparent. The iPad has a minimum touch target size – around 5mm in diameter, and this has resulted in most styli being fat crayons, whose tip thickness obscures the point at which marks are made. The Jot’s clear disc, and fine metal tip mean that you can clearly see where your pen mark is happening, at least as clearly as you would with any analog drawing implement. In ProCreate, I have the brush outline switched on, and it’s clearly visible through the disc. So, you get direct visual feedback of how the pressure you’re applying translates into brush size – assuming that’s the dynamic you’ve got enabled.
This brings up an important point – because the iPad has a hard, flat, glass screen, and the Jot Touch has a hard, flat, plastic tip, a small bit of grit could potentially get caught between them. If you’re pushing down on the pen, there’s a risk of scratching your iPad’s glass. My recommendation is to carry a micro-fibre cloth, and then clean both the iPad, and the pen tip before each drawing session. Another option might be to try a screen protector if the cleaning solution is unworkable.
Back to the stylus’ construction, possibly one of the nicest features is the recharging setup. The end of the pen latches into a usb recharging dock which is about the size of a tiny USB thumb drive. It’s held in by magnets, strong magnets, which support the pen securely regardless of orientation – mine hangs in space parallel to the floor, the charger plugged into the usb port in the side of one of my displays. The magnets also make docking the stylus automatic – get the end of the stylus close enough, and it will auto-align and pull into place.
The battery lasts long enough that I’ve never even come close to wearing it out – Adonit claims a month of “nomal use”. Like most of my devices, I plug it in each night, but you can happily leave the Jot in a bag for days without worrying about lacking power. I’m a big fan of built in batteries – the idea of having to use something like AAA batteries for a device is one of my pet peeves, so the Jot’s power setup really is a brilliant solution.
I’d like to close with a comparison – last week I received a Wacom Airbrush stylus, which I was intending to use to replace my broken Intuos4 XL Grip pen. It costs basically the same as the Jot Touch, and while it has a different featureset, in terms of build quality I think it’s reasonable to compare them. The Wacom pen is back with the distributor for exchange because all of the internals were so poorly fitted to the case that pressing the eraser in made the tip move out. It also felt fragile, hollow, squeezable under grip pressure, and cheap. The Jot Touch is utterly unlike that which we put up with from Wacom. It’s a true masterpiece of solid, functional, spare, Modernist industrial design, and a standard to which all objects one holds in one’s hand, should aspire.
If this article was of use, a donation would help support my projects.
Week 38 of 52
Work, work, work this week. I picked up the stainless braid, but apart from that, it’s been nose to the grindstone on the UWS sculpture. Progress is painfully slow – there’s lots of measuring, testing, planning and fitting. Because there’s lots of overlapping, nothing can be locked down, so I’m having to peel multiple pieces back in order to put in new support infrastructures for each new piece. That said, the work is coming along well, and the base should be complete in the next week.
I ordered a new pen for my Wacom tablet, after my old pen developed a cracked barrel. The choice was a Wacom Airbrush pen. Unfortunately, the unit that arrived was mediocre. The whole internals were insufficiently connected to the pen body, so that when you press the eraser, the nib popped out by 1mm, and then when you press down on the nib, you could feel it pop back in.
Needless to say, I returned it, and now I’m waiting for them to send a replacement.
Week 37 of 52
…in a row?
So this week, the green side of the UWS piece has been mounted to the completed armature, which has been painted black to make it less visible through gaps between the plates of the work. The attachment method I worked out was successful, but required a lot of drilling through metal. Since my drill bits had all become blunt, and drilling through metal is a mountain of effort, I dropped in to bunnings and picked up a couple of nifty things. Firstly, a drill sharpener – this is a marvel. It’s got a pair of grinding wheels driven by the drill itself, and then an attachment you put the bit into, which locates it against the grinding wheel. As you twist the attachment, the bit gets sharpened. It’s stunningly effective.
The other thing I picked up was a drill press. I’ve wanted one of these for ages, and they’re available for under a hundred bucks. So in the studio I’ve now got the Dremel, drill press, a cordless drill set up as a driver, another set up with a long socket extension, and an angle-grinder. Fun times.
The BIG news of the week, is I managed to secure a materials sponsorship for the work. The sponsor is the provider of the stainless steel hosepipe, who have been kind enough to give me all the stuff for free! This is an amazing development as it was expected to be a major cost in constructing the work. Fun, fun times.
Week 36 of 52
Had a bit of downtime this week, recovering from the grant application. Fingers crossed, I believe I put in the best proposal I could, so hopefully I’ll get the finance.
Most of the productive time this week was devoted to getting the armature for the UWS piece constructed. My original plan was to build it in PVC pipe, and then fill that with concrete. Unfortunately, after consulting with a cousin who’s a builder, I figured that the concrete would be too brittle, so I moved to galvanised threaded pipe. This has some significant advantages – it’s strong, self supporting, has readymade connectors, and won’t rust outdoors. The only problem was getting closed loops to work, because the pipe isn’t flexible. The solution to that was a PVC elbow or connection in those couple of places, which doesn’t appear to have effected the structural integrity to any great extent, and gave me the little bit of wiggle room necessary to close off rectangles.
In the next week the job is to get the green side mounted to the armature, and then build the coloured side. I’ve got some good ideas for how the mounting system will work, and hopefully the coloured side will be able to be made relatively self supporting, so it can be hung as a single unit on the armature, but that’s a nice if you can have it, cuttable option.
The other big news is that Derby Daze [squareformat] has been submitted to Apple, so hopefully should be available in the next week to 10 days. I’m really happy with how it’s turned out, as there were a few interesting challenges to overcome, but it has further cemented my working method for creating these books.